WSL2+Wolfi: The first WSL2 (un)distro
Introduction
Here’s a personal confession: I’m really bad with security. I mean, I do care about it, however it’s simply not my one of my “strong skills”.
That’s why, I do respect all the work the security oriented people and companies create and do for users like me. They help me securing my environment in a (more or less) easy and comprehensive way.
The world of Cloud Native is no exception and over time, we saw a lot of great companies emerging with their technologies that help securing the whole ecosystem.
More recently, the efforts are being put into “securing the supply chain”. A big term that I understand as: ensure that the container images a user runs are really the original container images from the creators/vendors.
This is achieved with a Software Bill of Materials (SBOM), which is formal and machine-readable metadata that uniquely identifies a software package and its contents.
You can find more information about SBOM on this ZDNET article from the one and only SJVN.
Okay, but what does it have to do with WSL2? Well, Chainguard, one of the most innovative company in Cloud Native and specialized in security (ever heard about sigstore?), just created the first Linux (un)distro designed for securing the software supply chain.
In addition, this (un)distro has a specificity that correlates a lot with WSL2 interoperability mindset: it doesn’t have a kernel of its own, instead relying on the environment (such as the container runtime) to provide one.
So, as the WSL Corsair, I simply couldn’t wait to “steal” this gem and now that’s in the distro chest, here’s how you can have it too.
Prerequisites
Here’s the list of components I used for this blog post:
OS: Windows 11 Professional version 22H2 - channel: Insiders dev / build: 25211
Docker: Rancher Desktop - runtime: moby
[Optional] Terminal: Windows Terminal
- Version: 1.16.2642.0
WSL Directories created:
WSL source files: C:\wslsources
WSL distros path: C:\wsldistros
Finding Wolfi
As stated in Wolfi github, it’s not made for Desktop. This means there won’t(?) be an ISO. Still, in this Cloud Native age, our “OS source” is different, it’s a container.
And as you guessed it, WolfiOS can be found as a container image in Chainguard’s containers repository: cgr.dev/chainguard/wolfi-base.
So now, you’re ready to install it on WSL2.
[Optional] Testing Wolfi
Before you install WolfiOS on WSL2, a good first step would be to test it as a container, and see by yourself what it contains:
# Create a new container
docker run --rm -it cgr.dev/chainguard/wolfi-base:latest

# Update the repository listing
apk update

# List the packages installed by default
apk list --installed

## Count the number of packages installed by default
apk list --installed | wc -l

# Count all the packages available from the WolfiOS repository
apk list --all | wc -l
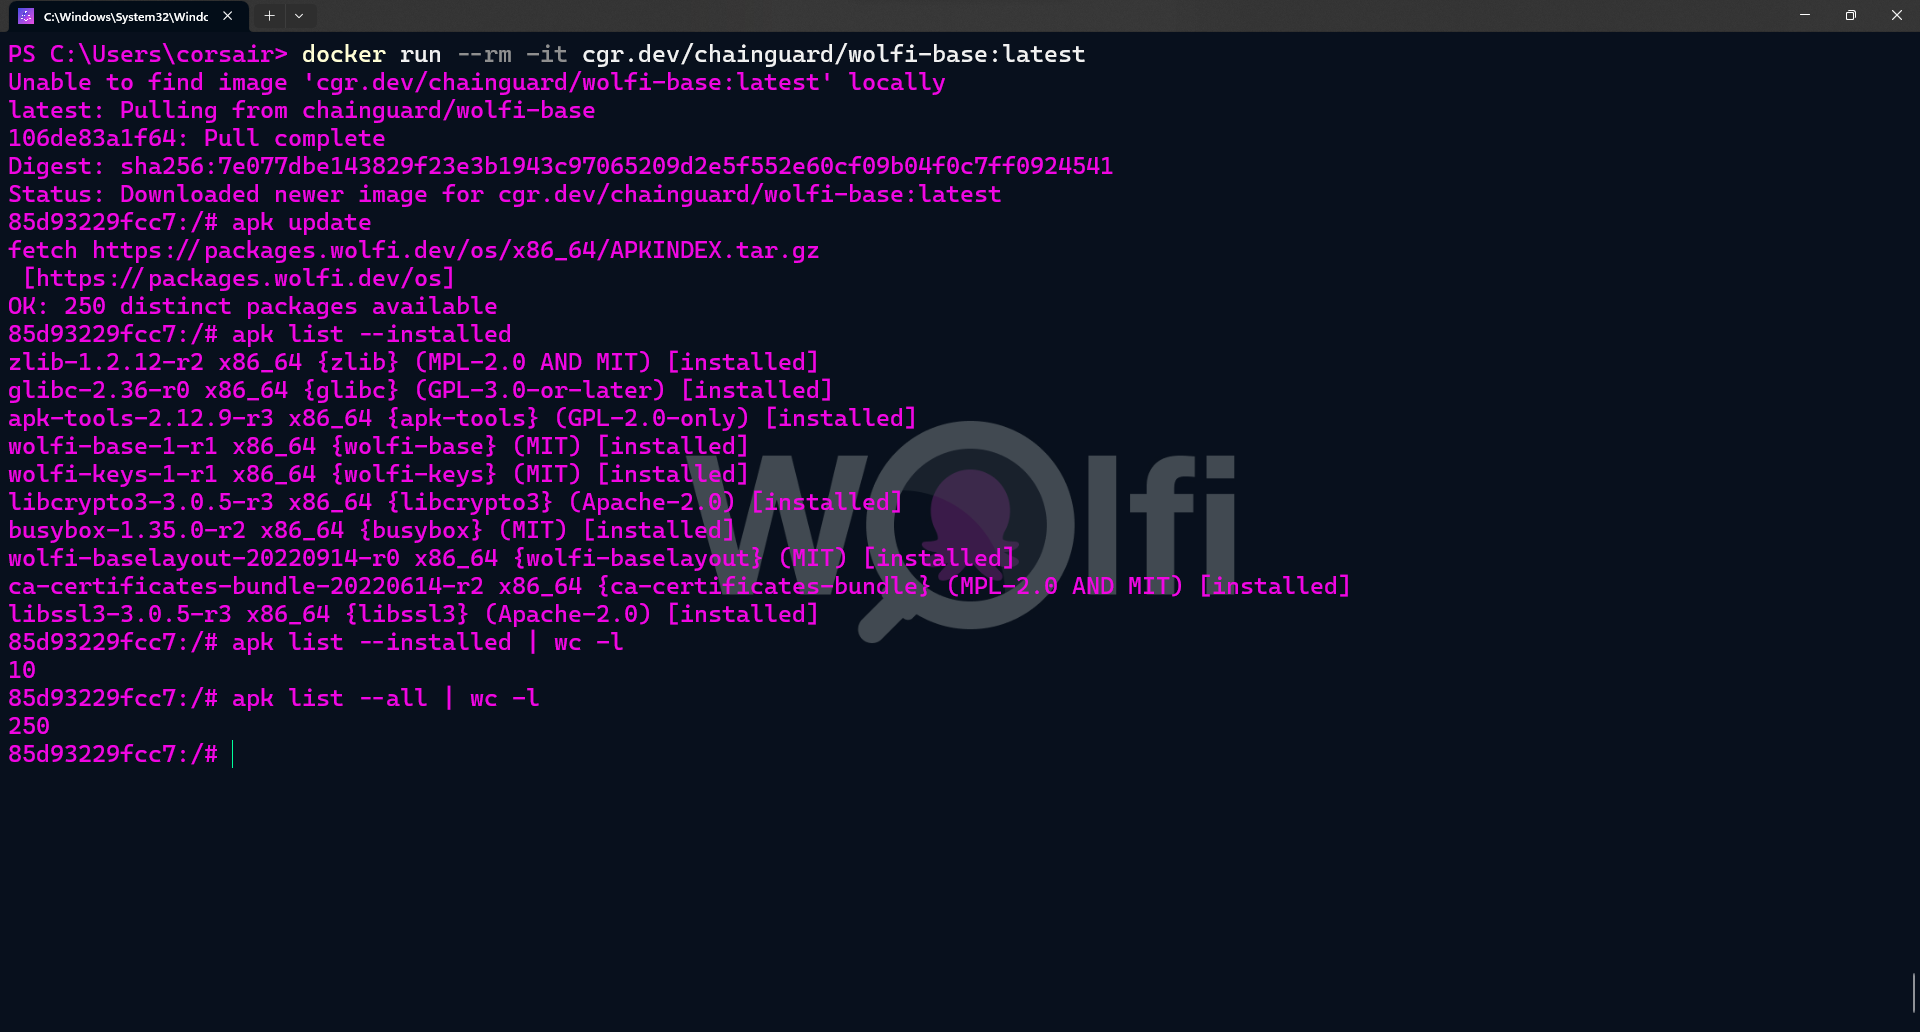
The package count is really more for fun, however it’s still mind-blowing to see that WolfiOS has only 10 default packages installed. To put it in perspective, Alpine (one of the smallest distro) contains 14 default packages.
The Chainguard team still managed to optimize it and created one of the smallest container distro, if not THE smallest (not counting scratch and other distroless images).
On the other end, the packages available are “a mere 250”, whereas Alpine has 4900+. And here lies the biggest difference: WolfiOS is really about Cloud Native applications and the base image is here to help providing a minimal and secured foundation for your business applications.
If you’re developing in-house business applications, then in order to ship them with WolfiOS, I would suggest that you have a serious look on melange and apko.
Installing WSL-Wolfi
Ok, the theory is nice and all, but I know you want to get started now. So without further due, let’s install WolfiOS on WSL2:
# Create a new container without any parameters except the name
docker run --name wolfi cgr.dev/chainguard/wolfi-base

# Export the container created to a compressed file
docker export -o C:\wslsources\wolfi.tar.gz wolfi

## [Optional] Check if the file was successfully created
dir C:\wslsources\wolfi.tar.gz

# Create a new WSL distro from the Wolfi container file
wsl --import wolfios C:\wsldistros\wolfios C:\wslsources\wolfi.tar.gz --version 2

# Login into your new WSL Wolfi distro
wsl -d wolfios

## [Optional] Check if you can update the system
apk update
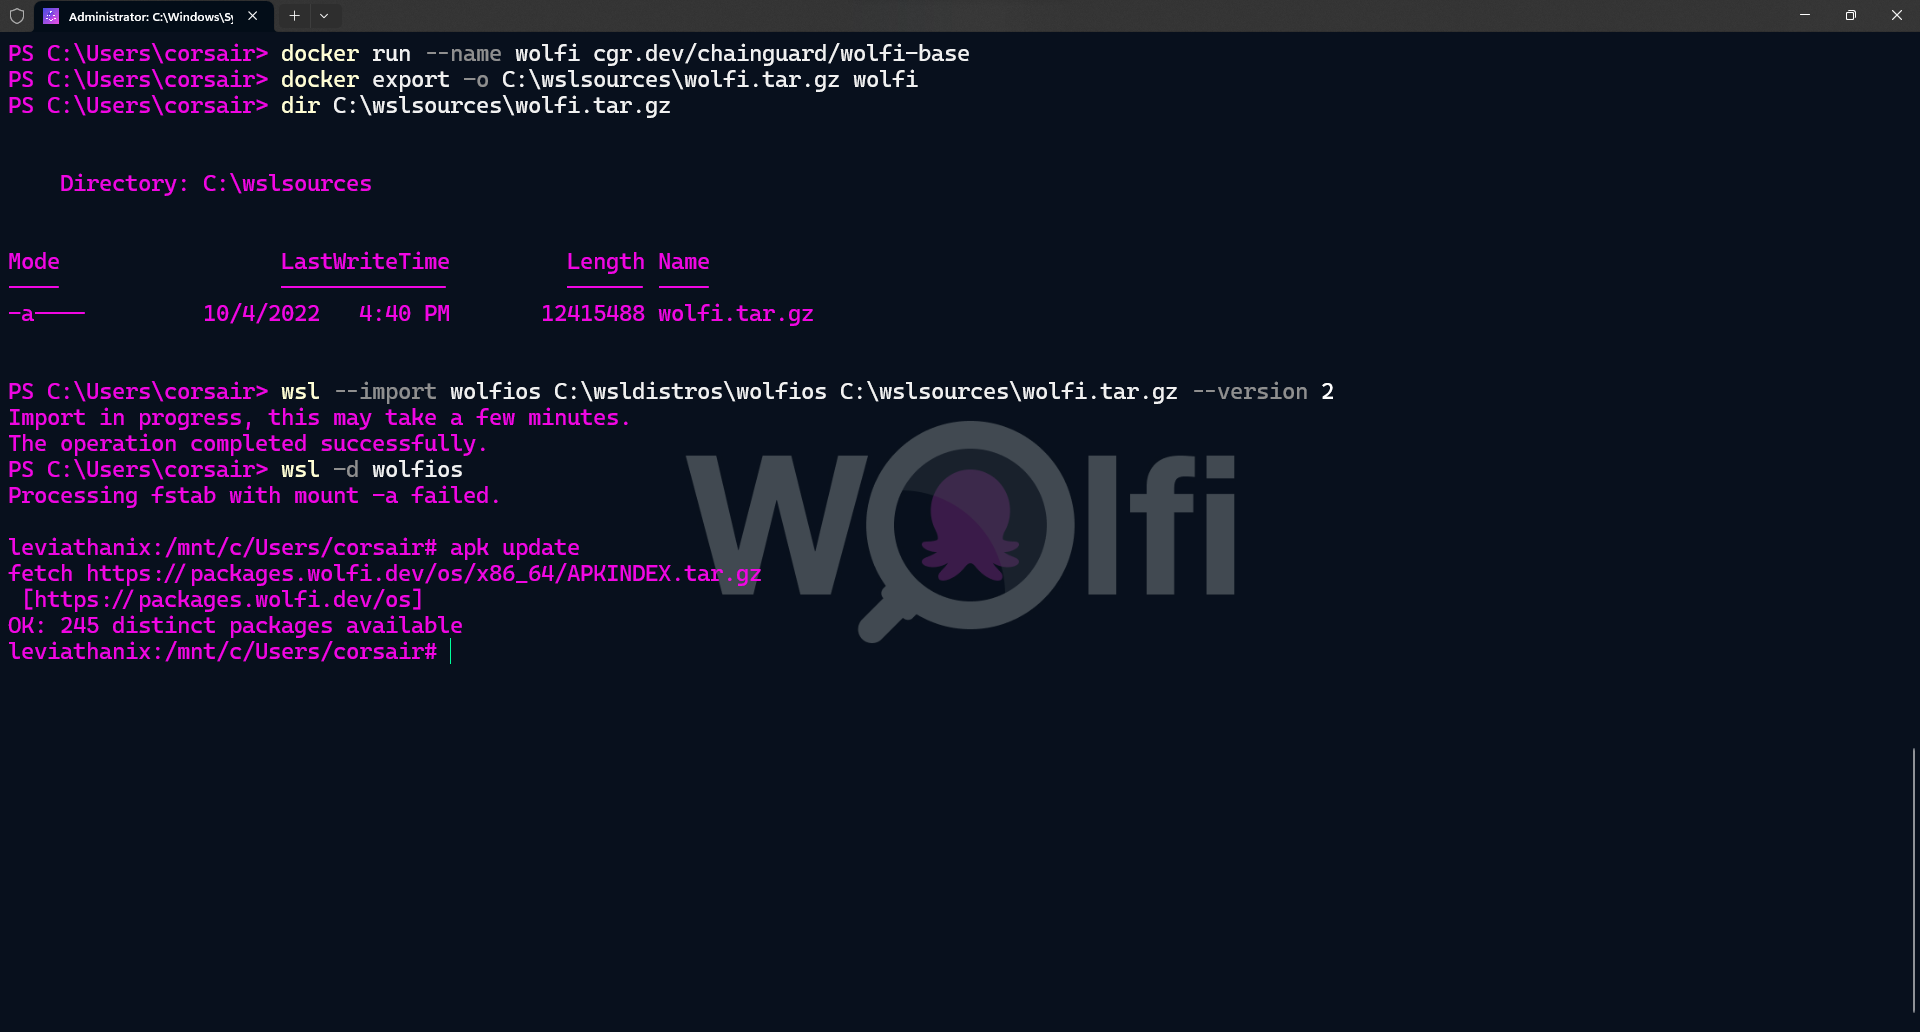
And voilà, you have your first WSL2 (un)distro installed and ready to be used.
Fun fact: the first time I imported it, it was so fast that I thought the file was actually empty and I would get an error when running
wsl -d wolfios.
Customizing Wolfi
In order to really enjoy using Wolfi on WSL2, you can (read: should) customize it a bit.
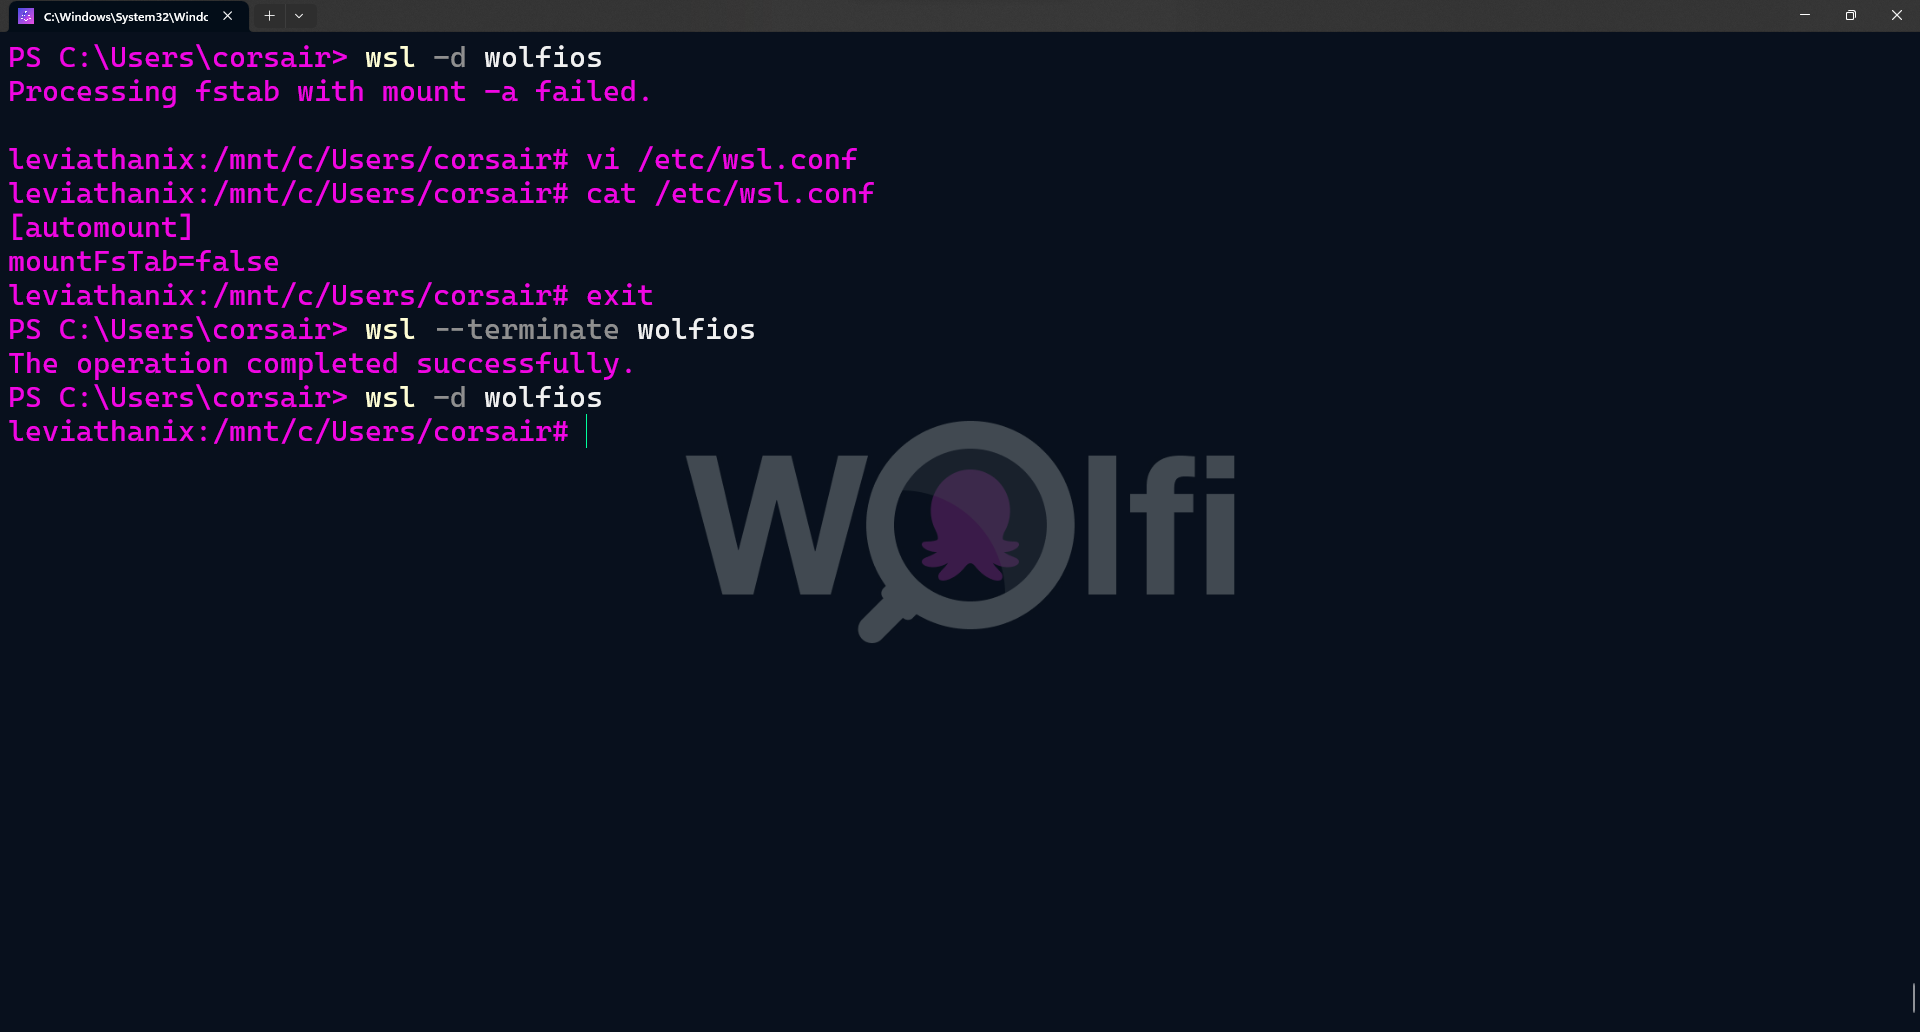
For example, when you logged in for the first time, you could see the error Processing fstab with mount -a failed. This error, while true, has no impact and you could fix it by creating an empty /etc/fstab file. However, let’s do the WSL2 method by ignoring this file by the WSL2 init system:
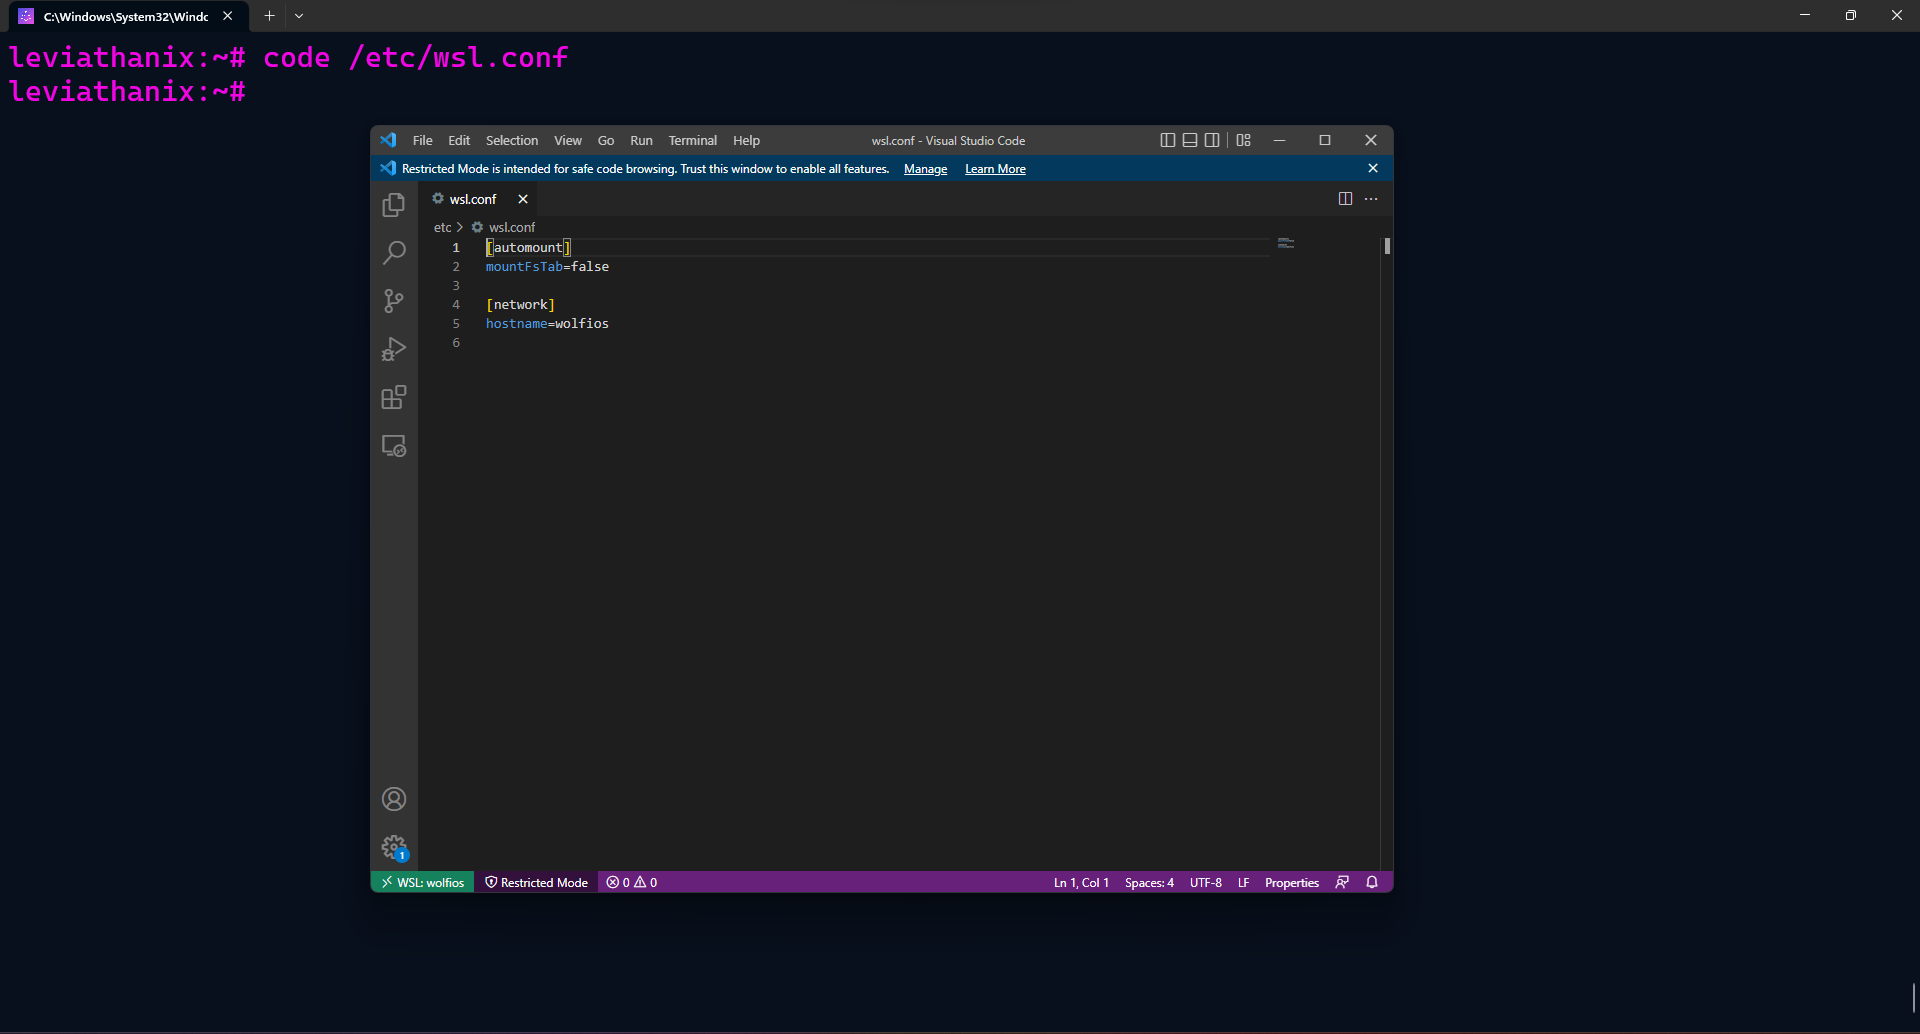
# Create the /etc/wsl.conf file
vi /etc/wsl.conf

# Disable the fstab automount and save your file
[automount]
mountFsTab=false

# Check if the file's content has been correctly modified
cat /etc/wsl.conf

# Exit the WolfiOS session
exit

# [Powershell] Close the WSL2 session for WolfiOS only
wsl2 --terminate wolfios

# Start a new WolfiOS session, the fstab error should be gone
wsl2 -d wolfios
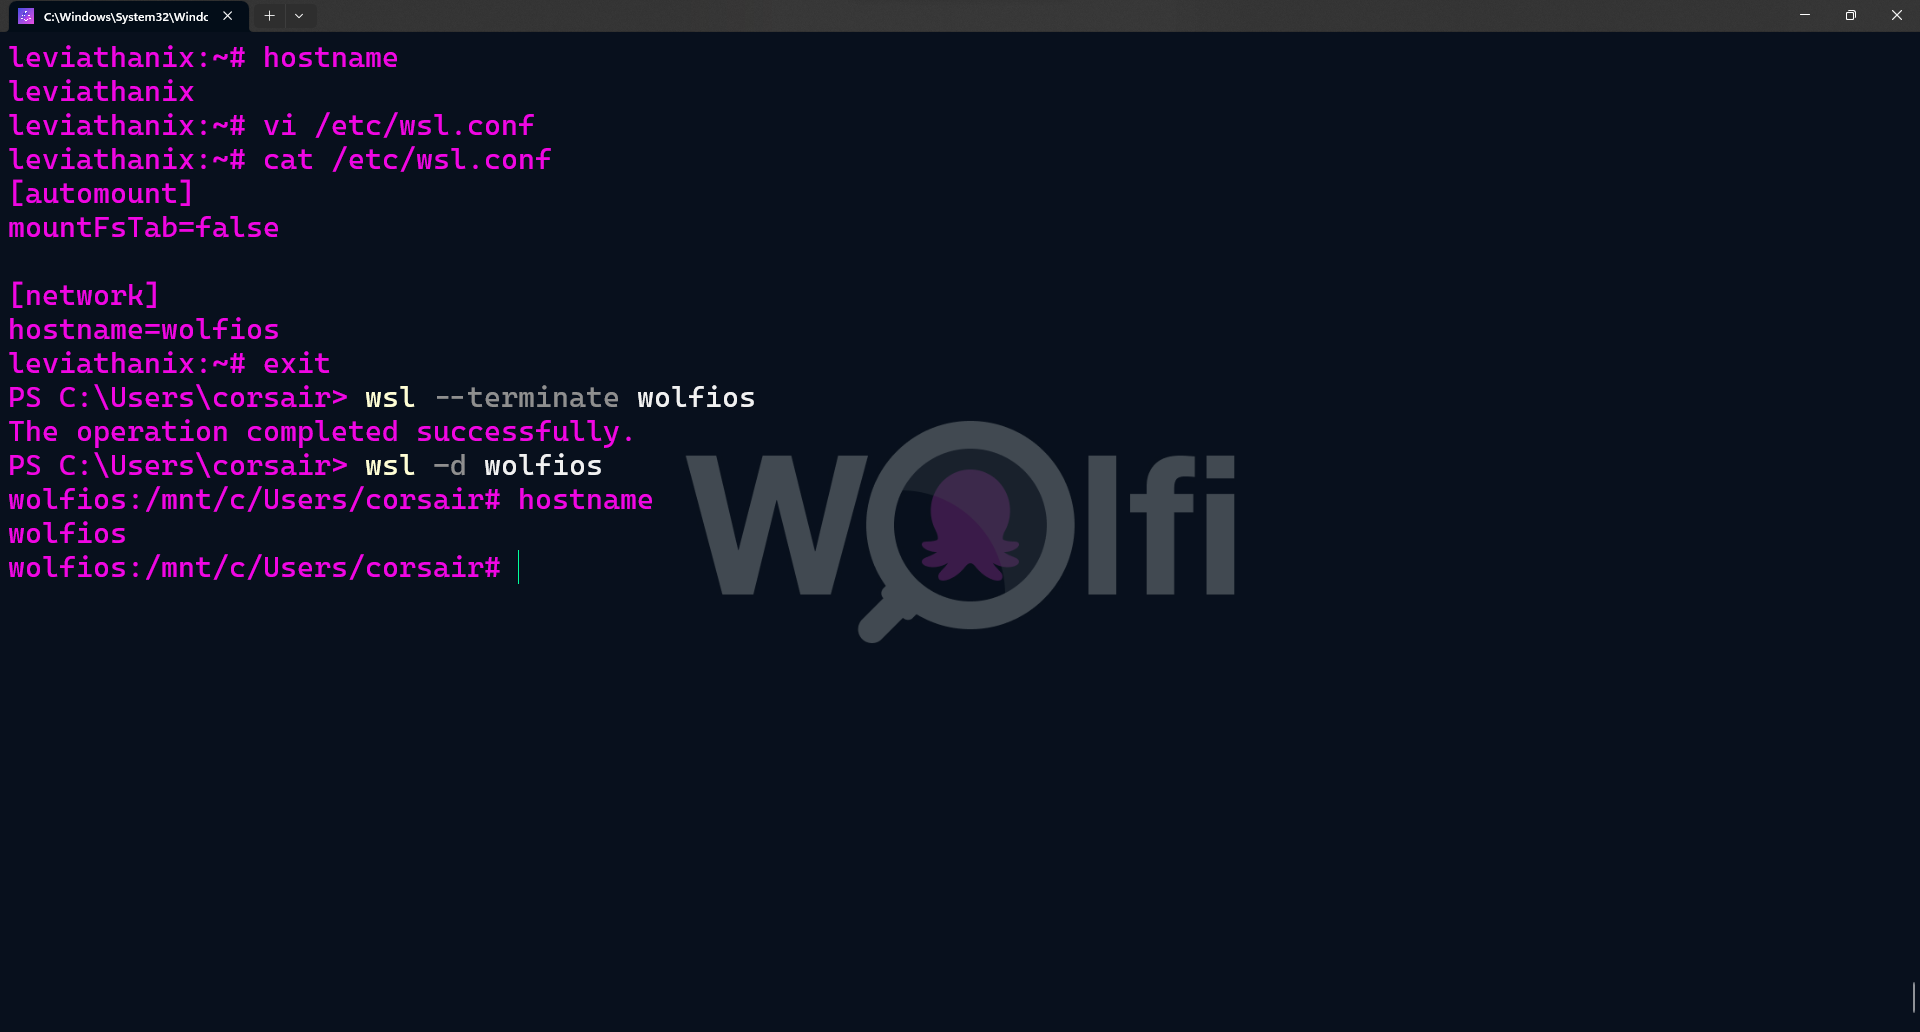
Another good practice, specially when you start having more than one distro, is to provide a hostname. Again, you can either change it on Linux or use the WSL2 configuration as follow:
# [Optional] Check the current hostname. Should be the same as your Windows hostname
hostname

# Edit the /etc/wsl.conf file
vi /etc/wsl.conf

# Create/Change the hostname value and save your file
[network]
hostname=wolfios

# Check if the file's content has been correctly modified
cat /etc/wsl.conf

# Exit the WolfiOS session
exit

# [Powershell] Close the WSL2 session for WolfiOS only
wsl2 --terminate wolfios

# Start a new WolfiOS session
wsl2 -d wolfios

# Check if the new hostname is correctly set
hostname
Conclusion
In terms of “mindset”, I really think WolfiOS and WSL2 are aligned, as both rely on external resources to make it “feel complete”.
WSL2 without a distro is a simple virtualization stack, and WolfiOS without a runtime is a simple container image. But together, the magic happens.
Also, in terms of “usage”, WolfiOS really enforces the principles of Cloud Native: use containerized apps instead of installing them on your OS directly and ensure everything you run is signed, validated and from the right source. This might sound obvious for the Cloud Native communities, but for someone coming from a “traditional” OS usage, this paradigm is sometimes hard to grasp.
Anyway, try WolfiOS, look at how it’s different from almost anything you might have tested before and see what is a “Linux (un)distribution built with default security measures for the software supply chain”.
Last word, as usual, if there is any comments, feel free to send them to @nunixtech on Twitter.
>>> Nunix out <<<
Bonus 1: Using VS Code with WSL2-WolfiOS
When using a WSL2 distro, one of the tools we might end up using (quite fast), is VS Code. From the simple edition of config files to actual programming, VS Code has become the main tool for WSL2.
And, as WolfiOS philosophy is to leverage external applications/components, then this fits perfectly.
However, here’s the trap: WolfiOS is a minimal OS and is built using the glibc libraries. However, the VS Code binaries for Alpine are built using the musl libraries. And WolfiOS is recognized as an Alpine distro due to the apk package manager (at least that’s my guess).
I’ll keep you away from all my try and fail attempts, and simply provide the solution: get the vs-code-server binaries, built with the glibc libraries. This is actually the default for the other distros (I found it using Clear Linux).
First, if you try running the usual command code ., you’ll get the following error.
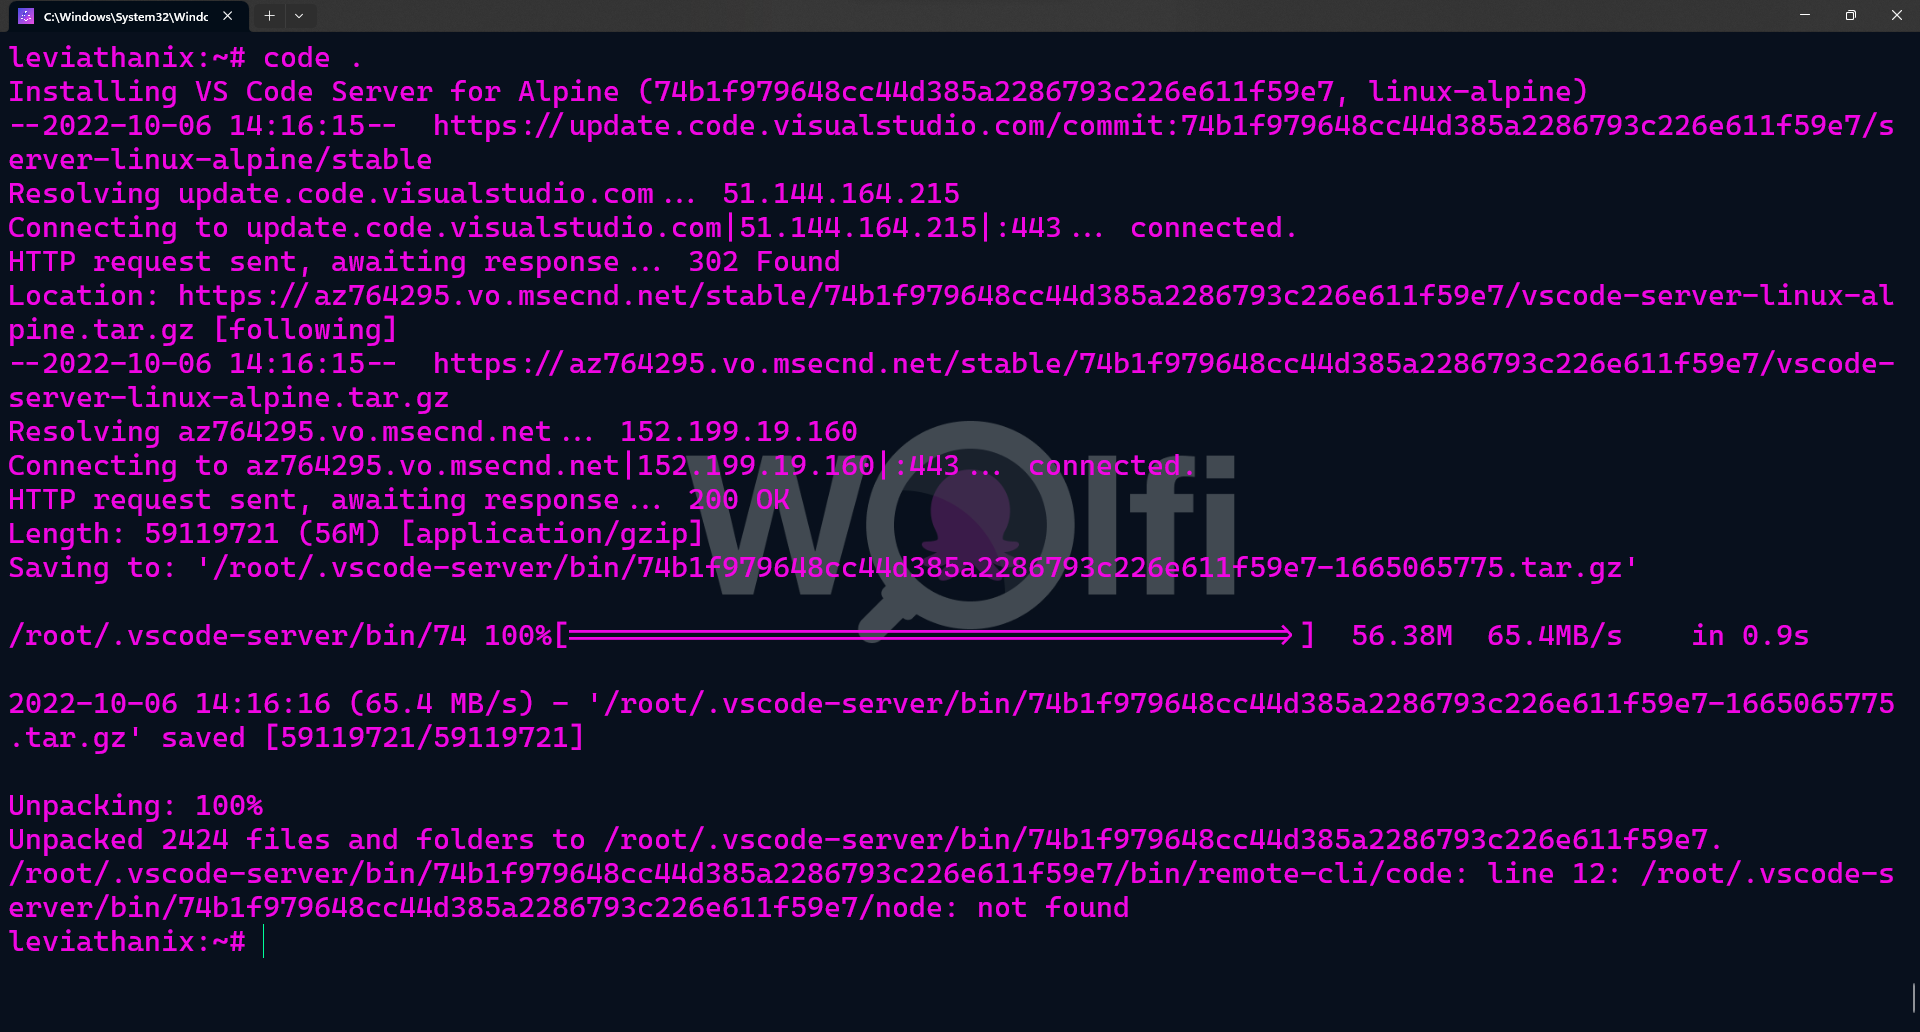
In this error output, there’s a valuable information: the VS Code commit ID. So now that you have it, we can install the VS Code server binaries on WolfiOS:
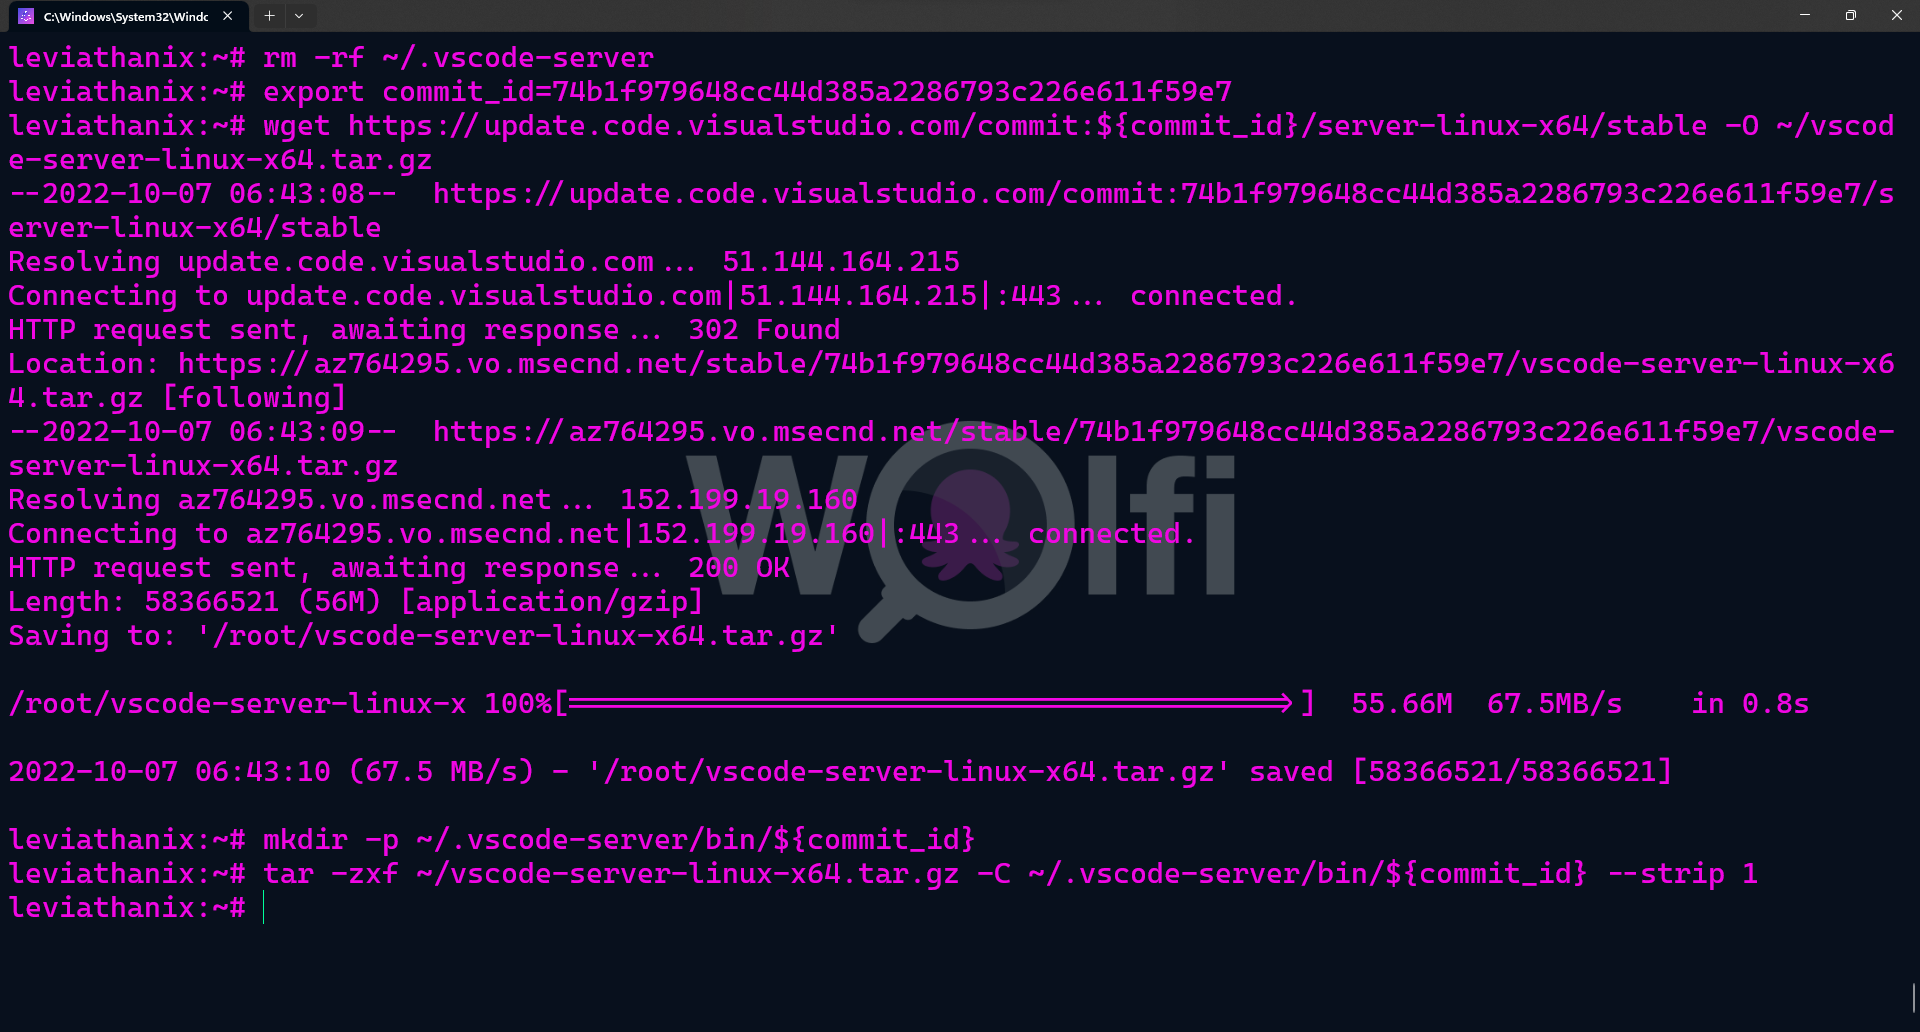
# First, clean up the .vscode-server directory
rm -rf ~/.vscode-server

# Create a variable with the commit ID value
export commit_id=74b1f979648cc44d385a2286793c226e611f59e7

# Download the VS Code server binaries
wget https://update.code.visualstudio.com/commit:${commit_id}/server-linux-x64/stable -O ~/vscode-server-linux-x64.tar.gz

# Create the .vscode-server directory and the subdirectories for the binaries
mkdir -p ~/.vscode-server/bin/${commit_id}

# Extract all VS Code server binaries to the directory created
tar -zxf ~/vscode-server-linux-x64.tar.gz -C ~/.vscode-server/bin/${commit_id} --strip 1
You can finally launch VS Code from WolfiOS.
Bonus 2: adding some Rust coreutils
As described in Bonus1, WolfiOS comes with Busybox utils.
For fun, let’s replace it with coreutils but with a twist: the Rust coreutils.
So if you want some Rust core tools in your Wolfi, here’s how:
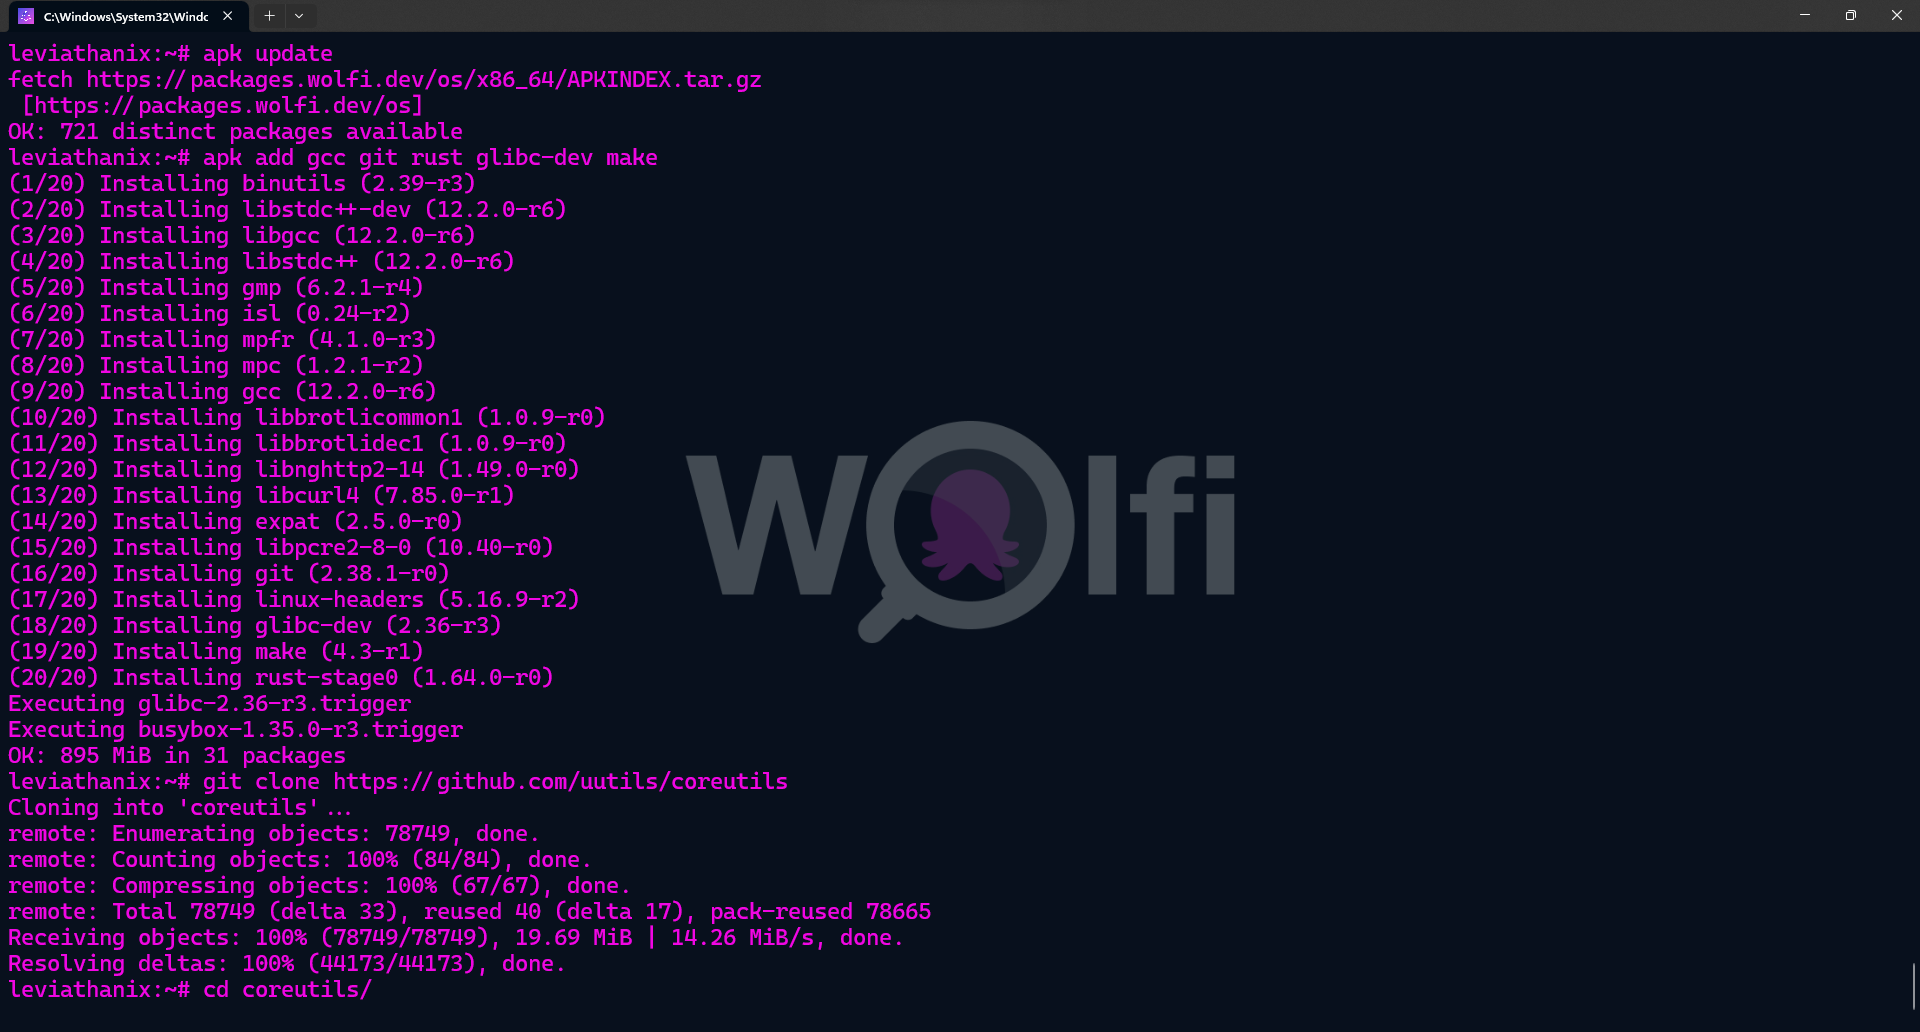
- First, install the required packages and clone the git repo
# Refresh the packages list
apk update

# Add required packages
apk add gcc git rust glibc-dev make

# Clone the git repo
git clone https://github.com/uutils/coreutils

# Change directory to the coreutils one
cd coreutils/
- Build and install the tools
# Build all the utilities using cargo
cargo build --release

# Install all the utilities using make
make install

# Confirm the default commands now are linked to the Rust coreutils
ls -l `which cat`

# Check the version of an original command
/bin/cat --version

# Check the version of the Rust coreutils command
cat --version

And you’re done! WolfiOS has now the coreutils written in Rust.