WSL2+Microk8s: the power of multinodes
Introduction
During the first ever WSLConf, which went from an onsite to online event, I did showcase Canonical Kubernetes cluster Microk8s on WSL2
The demo told a story of going from the usual local one node k8s cluster to a multi-node in WSL2. And it ended with a (huge?) surprise: everything was running on Windows Server 2019 Insider
Now it’s your turn and while in the demo the first parts were already done for a time management purpose, I will explain everything here so you can understand the “first half” also.
Prerequisites
Here is the list of components and software I used during the demo. Of course, please feel free to use your own preferred software when possible.
Host setup
The host was an Hyper-V Virtual Machine running Windows Server 2019 Insider with 8Go RAM and 4vCPUs. And I can already tell that it was not enough power to run the final solution while sharing my screen.
Therefore I do recommend, if you can afford it, to use between 8 and 16Go RAM and 4 to 6vCPUs.
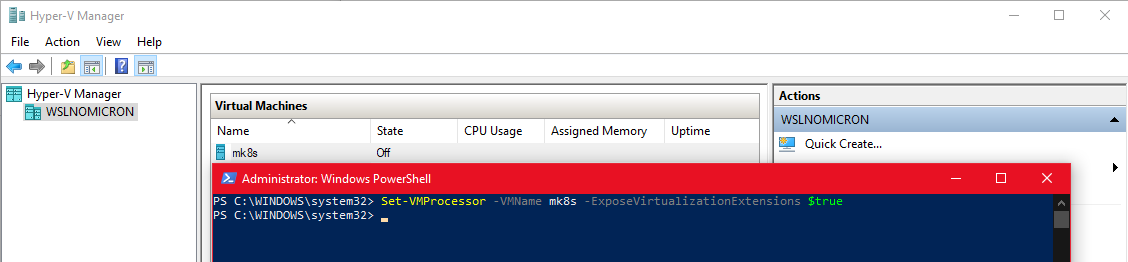
The VM will need to have the nested virtualization enabled. This can be done once the VM has been created and before booting it to install Windows Server, run the following command in Powershell on Windows 10:
Set-VMProcessor -VMName mk8s -ExposeVirtualizationExtensions $true
Windows Features
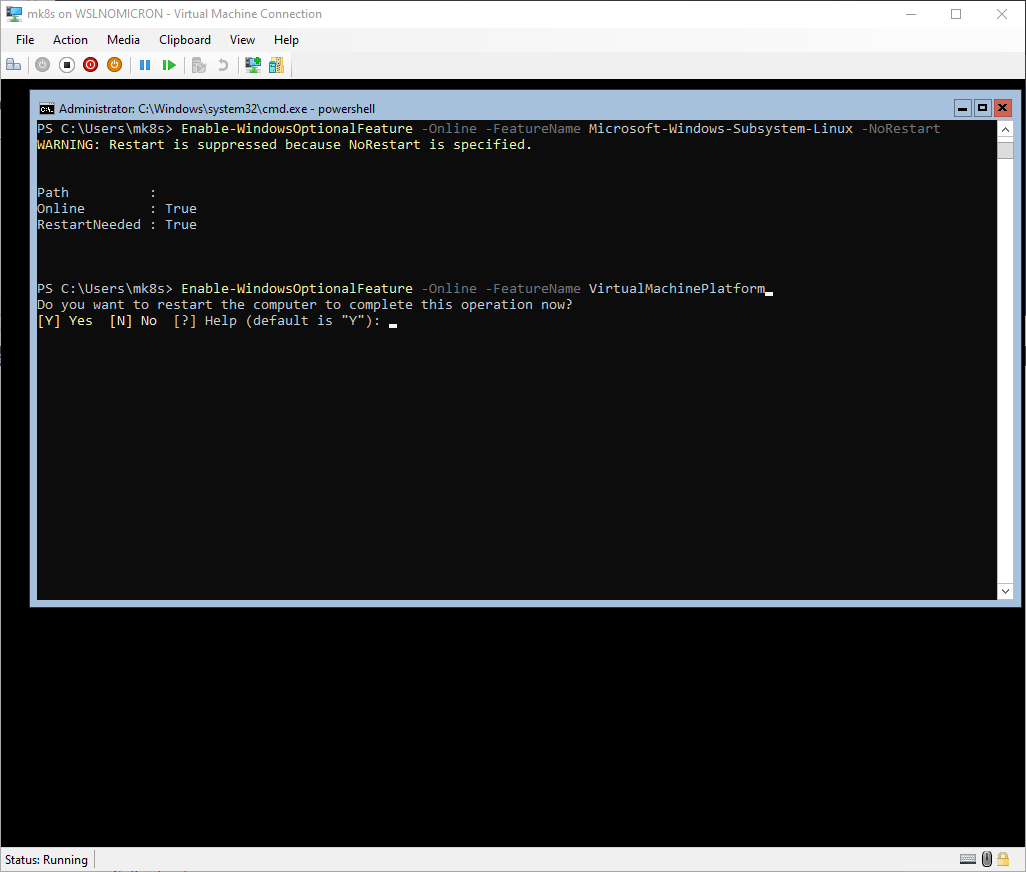
Once Windows Server is installed, we can enable WSL2 and the Virtualization Platform features (in Powershell):
Enable-WindowsOptionalFeature -Online -FeatureName Microsoft-Windows-Subsystem-Linux -NoRestart

Enable-WindowsOptionalFeature -Online -FeatureName VirtualMachinePlatform
For the second feature, you will be asked to reboot the server, say yes:
Tip: set Powershell as the default shell for the current user
- type
regedit- Go to
HKCU:\Software\Microsoft\Windows NT\CurrentVersion\Winlogon- Create new
String Valuekey calledShell- Set the value to
C:\Windows\System32\WindowsPowershell\v1.0\powershell.exeOn the next reboot, enjoy your default new shell
WSL distro requirements
Now that WSL(1⁄2) is enabled, we will need to get a base distro. Once again, based on the WSLConf demo, we will install Ubuntu 20.04 (Focal Fossa).
Luckily for us, Canonical is now providing the rootfs for their distributions here: https://cloud-images.ubuntu.com/focal/current/
In order to have a “clean” environment, I like to create two directories that will host the sources of the (various) rootfs and the “installed distro” files:
# Create a directory to store the rootfs.tar files
mkdir C:\wslsources
# Create a directory to store the installed distros
mkdir C:\wsldistros
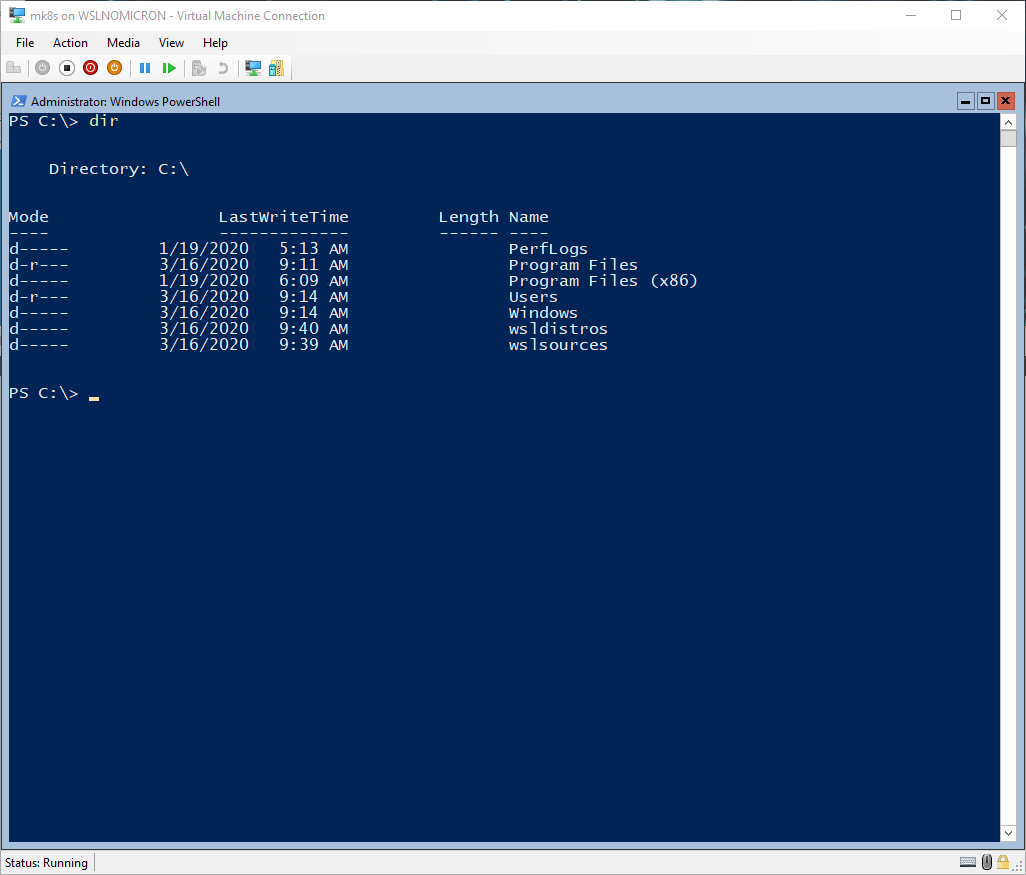
Tip: both directories were created at a level all users can access. It will be very useful for a later use.
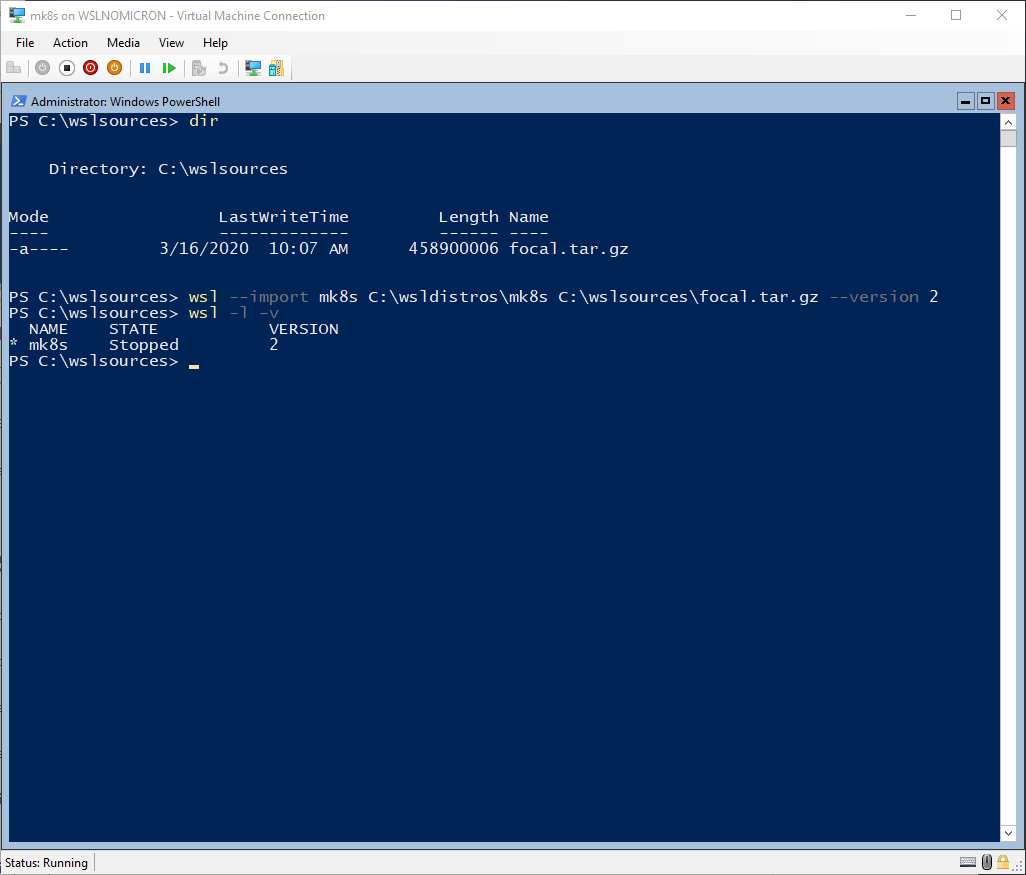
With the directories created, let’s download the rootfs from the link: https://cloud-images.ubuntu.com/focal/current/focal-server-cloudimg-amd64-wsl.rootfs.tar.gz (depending on your bandwidth, this might take some time)
Finally, we can import the rootfs as a WSL2 custom distro:
wsl --import mk8s C:\wsldistros\mk8s C:\wslsources\focal.tar.gz --version 2
Tip: set WSL version 2 as the default for all new imported distros:
wsl --set-default-version 2
WSL setup
With WSL2 installed and our first distro imported, we perform the basic configuration
The rootfs does not have a user except root and is not “optimized” for WSL, yet.
And in addition to the basic configuration, we will also enable SystemD thanks to the scripts from @diddledan
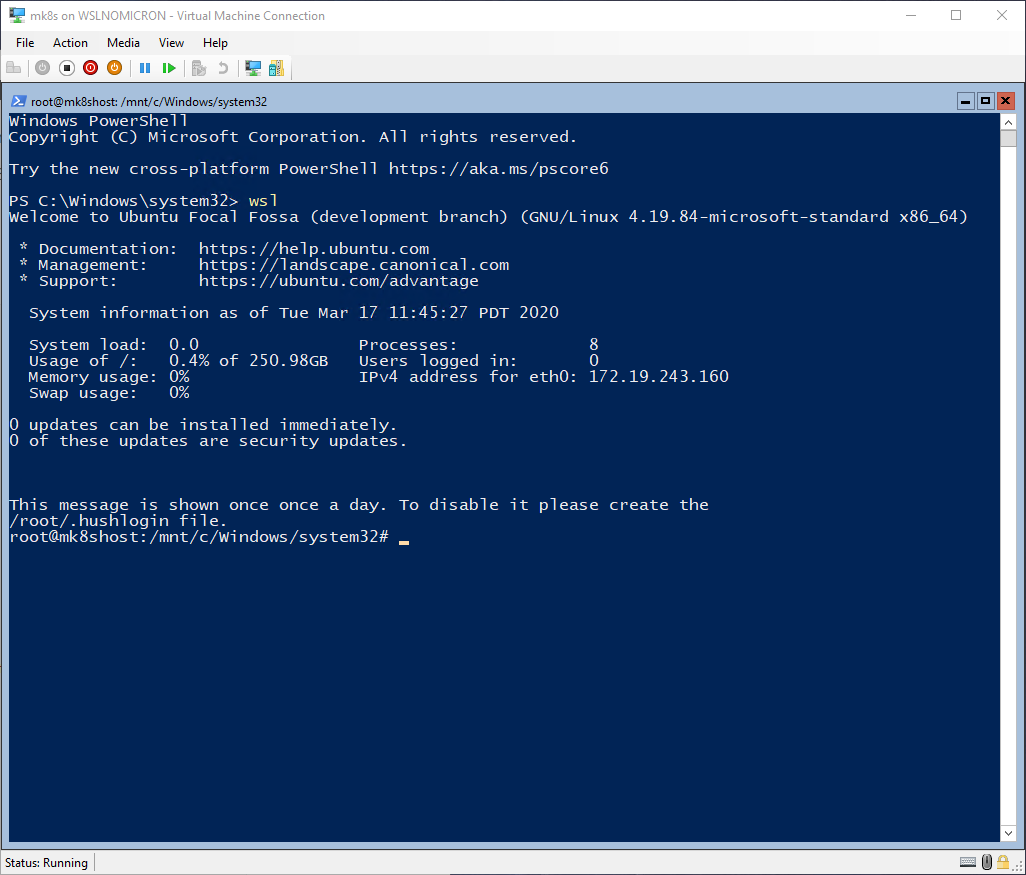
Without further due, let’s jump into our WSL shell:
# Launch a new WSL session
wsl
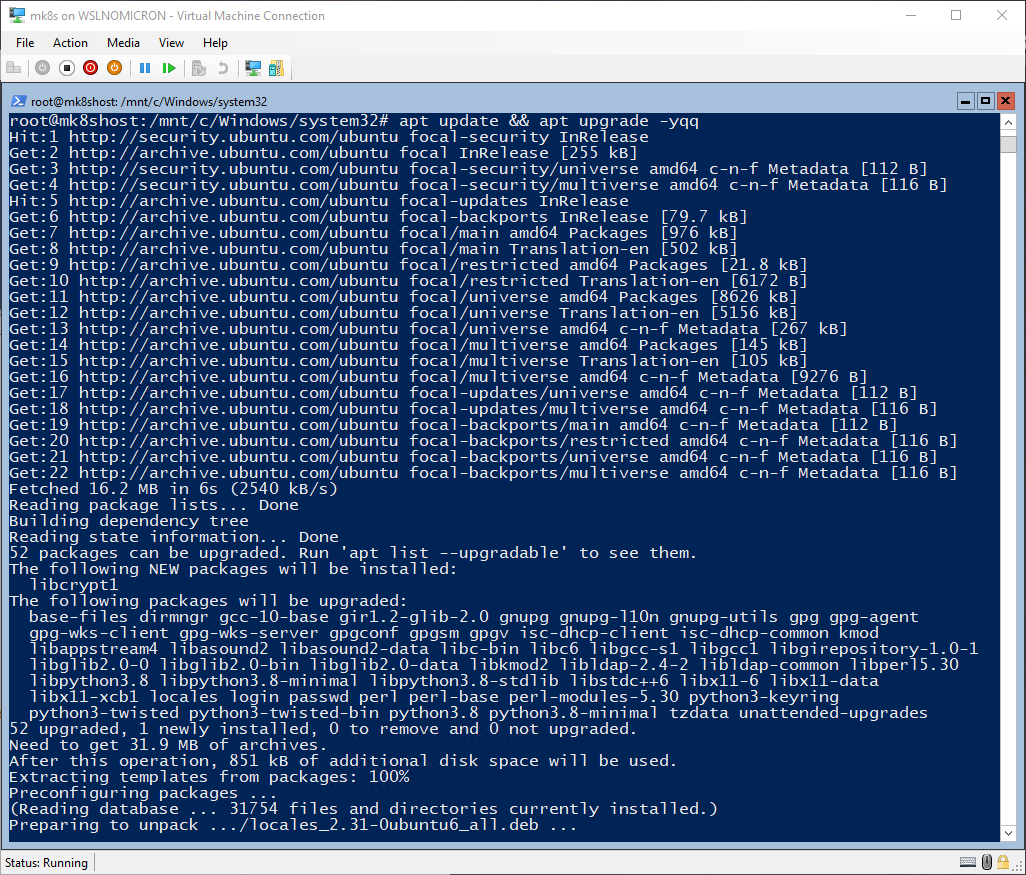
# Update the system
apt update && apt upgrade -y
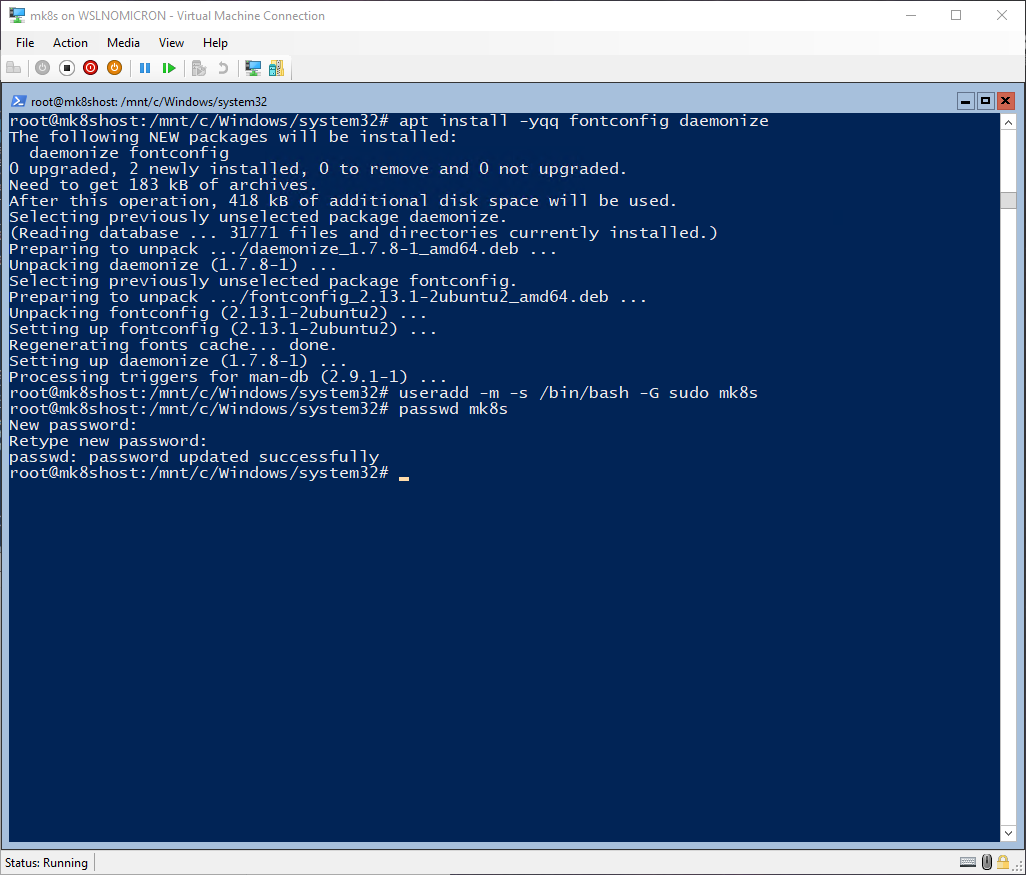
# Install the required packages for SystemD
apt install -yqq fontconfig daemonize
# Creates a default user and adds it to the sudo group
useradd -m -s /bin/bash -G sudo mk8s
# Reset the password of the default user
passwd mk8s
# Edit the sudoers to remove the password request
visudo
    %sudo   ALL=(ALL:ALL) NOPASSWD: ALL
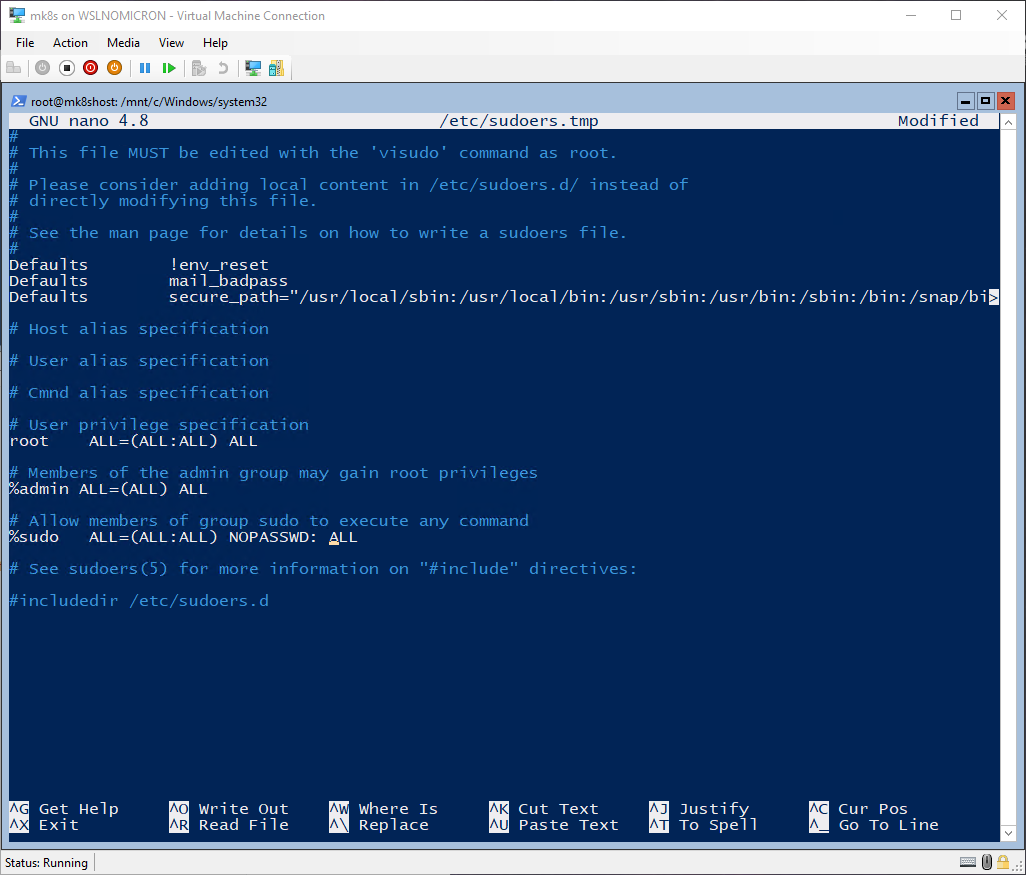
Tip: the help commands are written at the bottom of the console and the “^” character represents CTRL
Tip2: if
nanois not your favorite editor, once you have finished editing the the file, type CTRL+X to exit, then type “y” and finally press enter
# Create the wsl.conf file
vi /etc/wsl.conf
[automount]
enabled = true
options = "metadata,uid=1000,gid=1000,umask=22,fmask=11,case=off"
mountFsTab = true
crossDistro = true

[network]
generateHosts = false
generateResolvConf = true

[interop]
enabled = true
appendWindowsPath = true

[user]
default = mk8s
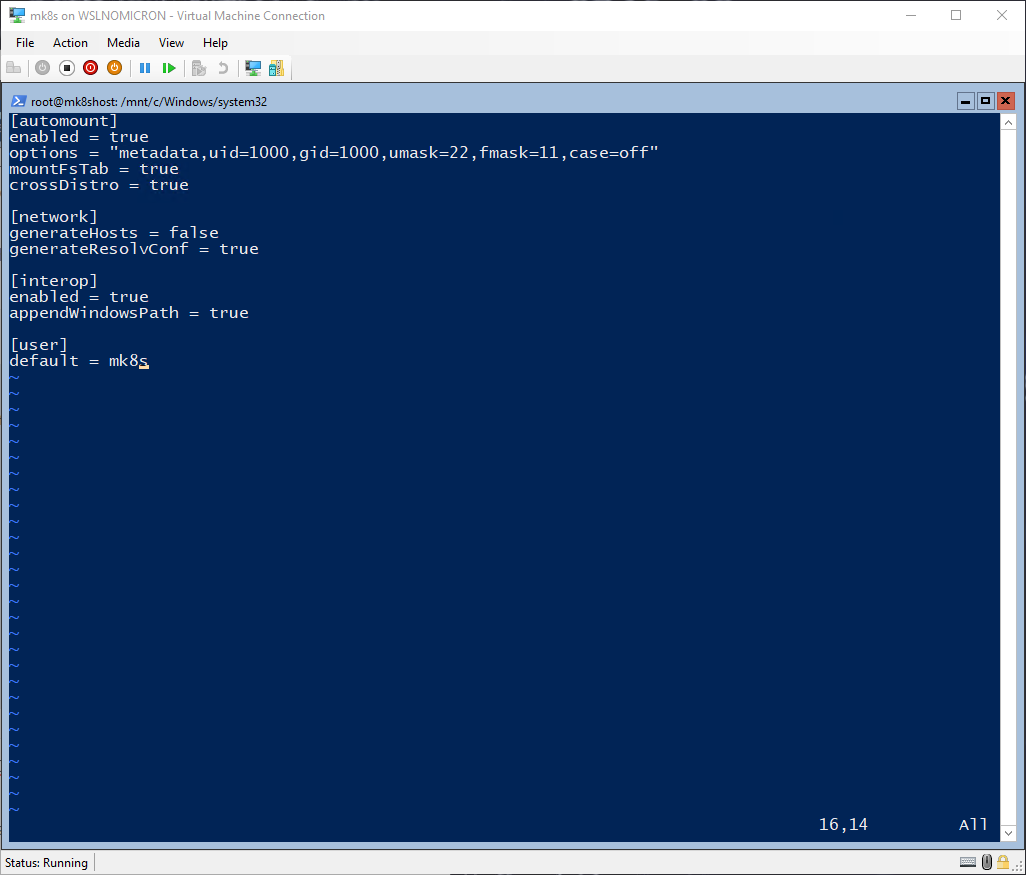
The basic configuration is now done, and before we move into the SystemD setup, let’s quickly explain the main options of the wsl.conf.
In the [automount] section, the new option crossDistro will allow us to see and share the content of the rootfs with other distros.
In the [network] section, the generateHosts is disabled so the /etc/hosts file won’t be overwritten by each new session.
Finally, in the [user] section, we set the default user to the one we created (mk8s in this example).
SystemD setup
Here we have the first fun part and, for the time being, the part not supported by WSL officially. Which makes it even more cool, right.
One of the main gap of WSL is (was?) that SystemD is not able to start due to the lack of pid 1.
This impacts several distros and some applications that depend on it or, in the case of Ubuntu, are only available as snaps (which depends on SystemD).
Luckily, a very smart person found a way to start SystemD inside WSL2: https://forum.snapcraft.io/t/running-snaps-on-wsl2-insiders-only-for-now/13033
Let’s setup it in our distro based on the forum post:
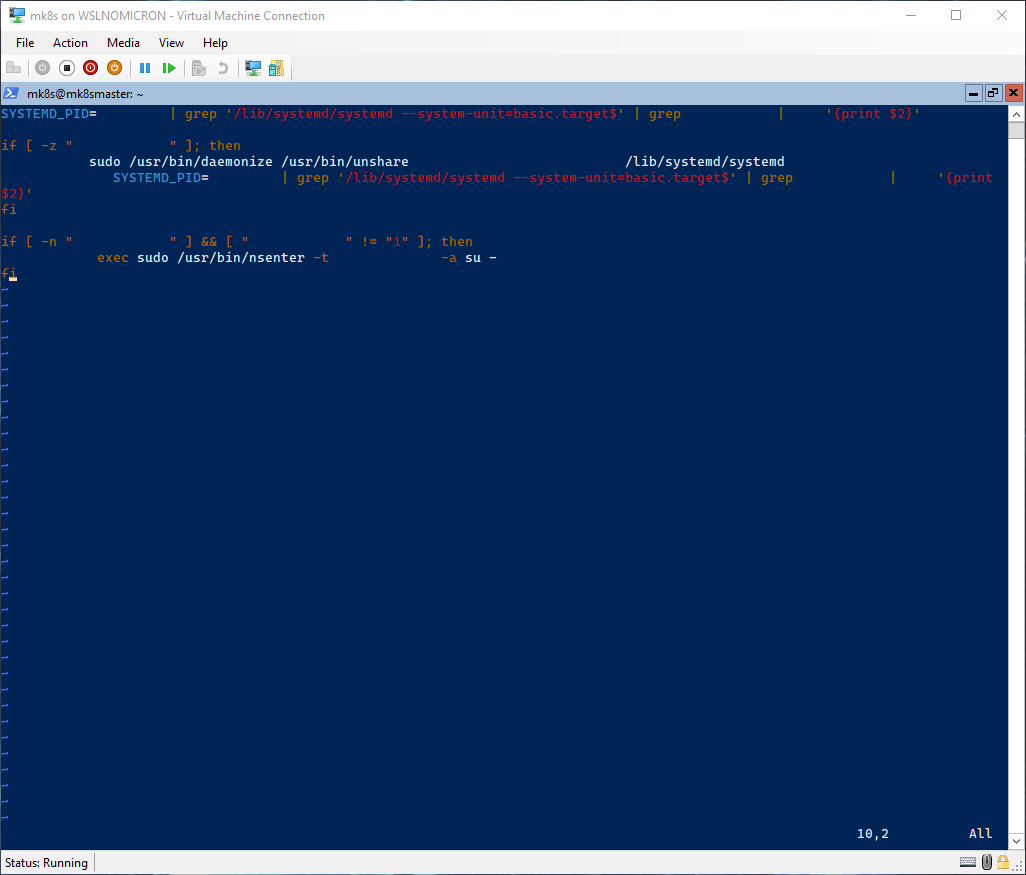
# Create the starting script for SystemD
vi /etc/profile.d/00-wsl2-systemd.sh
SYSTEMD_PID=$(ps -ef | grep '/lib/systemd/systemd --system-unit=basic.target$' | grep -v unshare | awk '{print $2}')

if [ -z "$SYSTEMD_PID" ]; then
   sudo /usr/bin/daemonize /usr/bin/unshare --fork --pid --mount-proc /lib/systemd/systemd --system-unit=basic.target
   SYSTEMD_PID=$(ps -ef | grep '/lib/systemd/systemd --system-unit=basic.target$' | grep -v unshare | awk '{print $2}')
fi

if [ -n "$SYSTEMD_PID" ] && [ "$SYSTEMD_PID" != "1" ]; then
    exec sudo /usr/bin/nsenter -t $SYSTEMD_PID -a su - $LOGNAME
fi
Tip: after few tests, I decided to go with the “old” solution. Feel free to use the new one based on two files and the edition of /etc/bash.bashrc
SystemD is now setup and ready to be used. So let’s exit and start a new session with our newly SystemD.
Network setup
With SystemD, we might have some glitches at the network level. One is the DNS resolver not working. To fix it, let’s update the resolved.conf file to use a public DNS:
sudo vi /etc/systemd/resolved.conf
...
[Resolve]
DNS=8.8.8.8
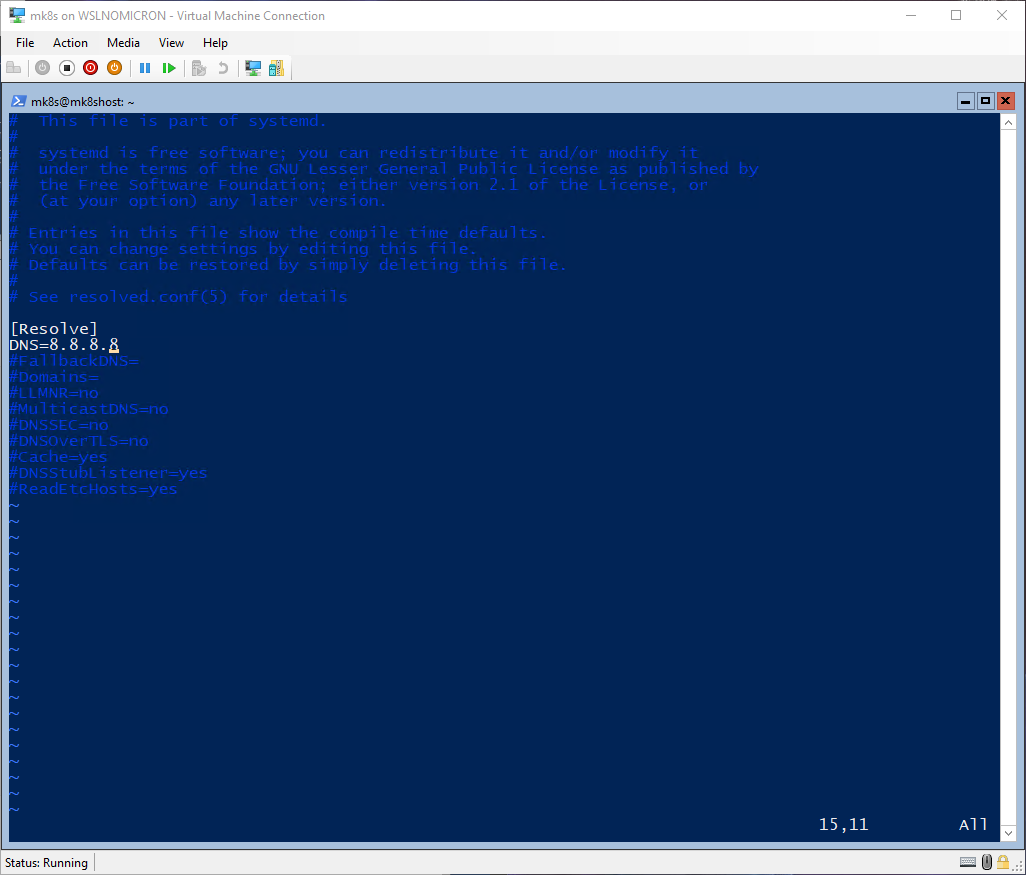
To apply the config change, we need to restart the service and run an update to confirm it’s working fine
sudo systemctl restart systemd-resolved
sudo apt update

Another issue, is that we are “living” inside the WSL2 microVM and we need to forward the localhost ports to the default interface (eth0 in our case). This will be useful (read: needed) to reach the applications that we will install later.
Here is the setting that will allow it:
# Forward all localhost ports to default interface
echo 'net.ipv4.conf.all.route_localnet = 1' | sudo tee -a /etc/sysctl.conf
# Apply the change
sudo sysctl -p /etc/sysctl.conf
Congratulations! We have now our custom distro with SystemD enabled. So it’s now time to move to the next stage and install Microk8s.
Microk8s Single node
Thanks to SystemD, our distro actually gained another very nice feature: snap.
You are reading it right, we can now also install softwares via the snap package manager. And actually this is a needed feature as Microk8s is only available as a snap package.
Let’s see which snaps are already installed:
# List all installed snap packages
snap list
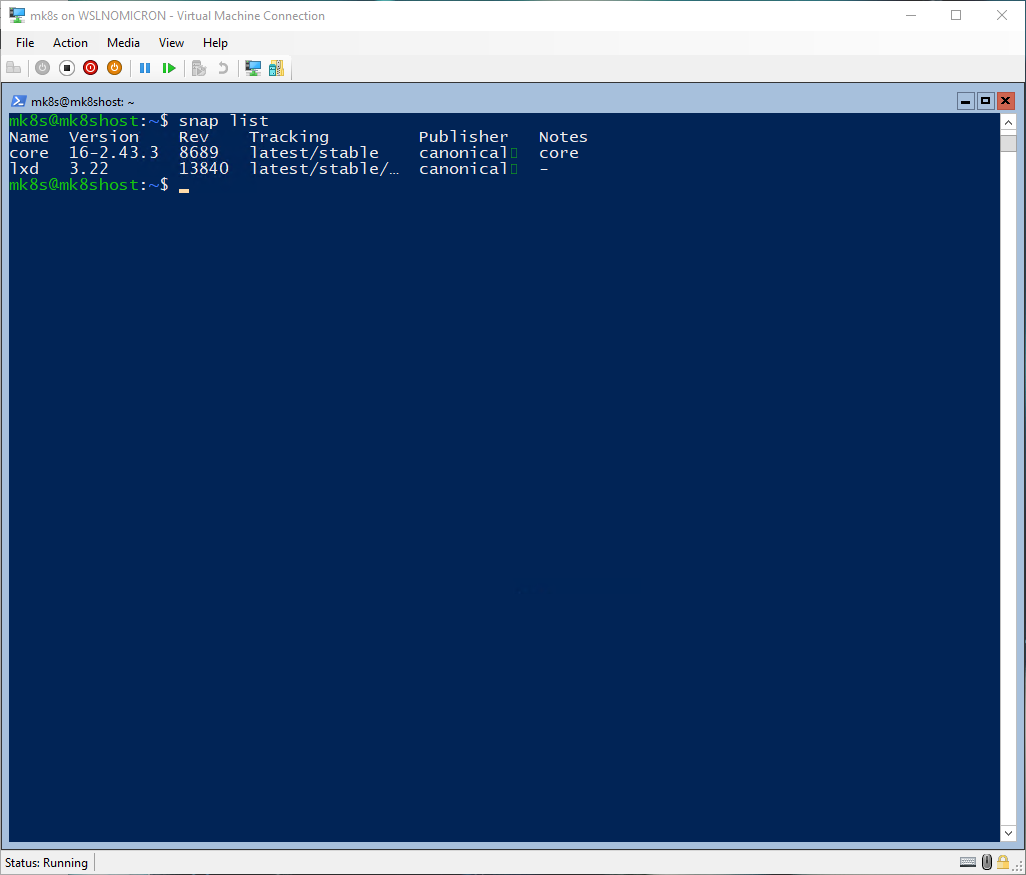
The important snap, Core, is already installed.
[Optional] Add a modern font with CascadiaCode
As you can see, the snap list has a strange character after the name canonical. This simply means the default font used by the terminal does not have the character in its character list.
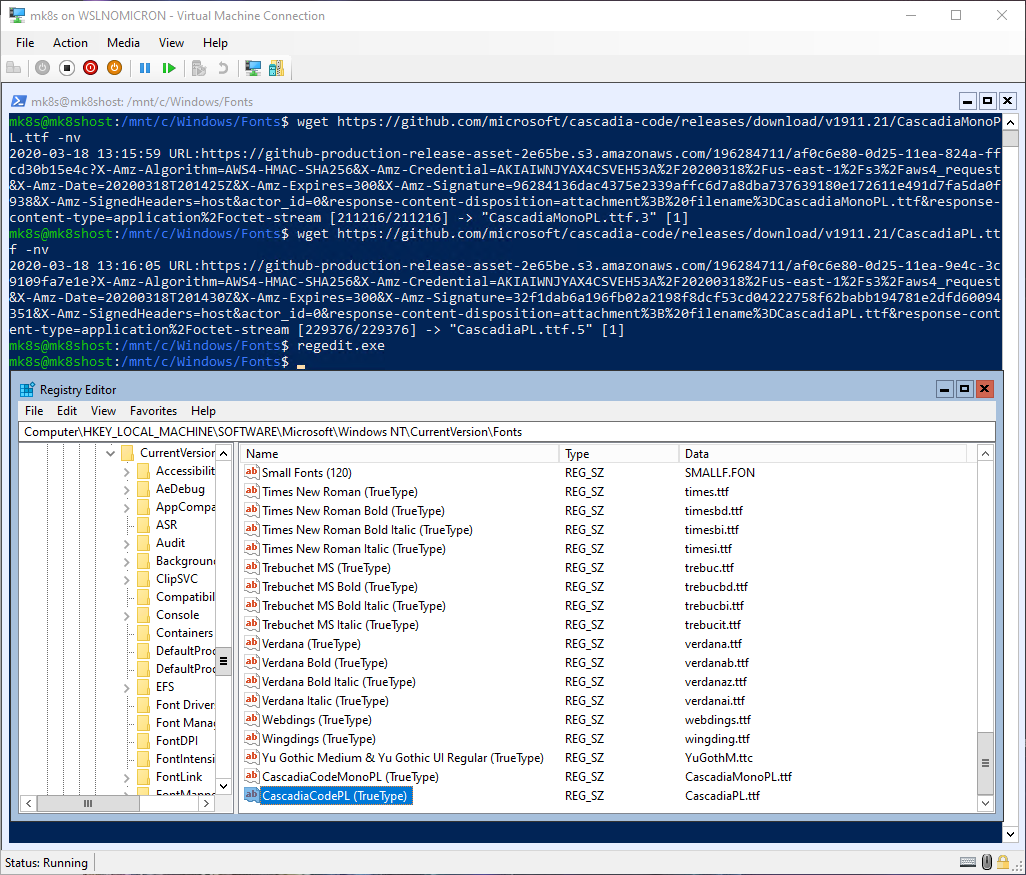
Let’s remediate to that with a quick fix:
# Move into the Windows Fonts directory
cd /mnt/c/Windows/Fonts
# Get the latest font from GitHub.com (I took both PowerLine fonts)
wget https://github.com/microsoft/cascadia-code/releases/download/v1911.21/CascadiaMonoPL.ttf
wget https://github.com/microsoft/cascadia-code/releases/download/v1911.21/CascadiaPL.ttf
# Register the fonts in Windows Registry
regedit.exe
[HKLM:\SOFTWARE\Microsoft\Windows NT\CurrentVersion\Fonts]
Create two new string values with the following names and values:
- Name: CascadiaCodeMonoPL (TrueType) Value: CascadiaMonoPL.ttf
- Name: CascadiaCodePL (TrueType) Value: CascadiaPL.ttf
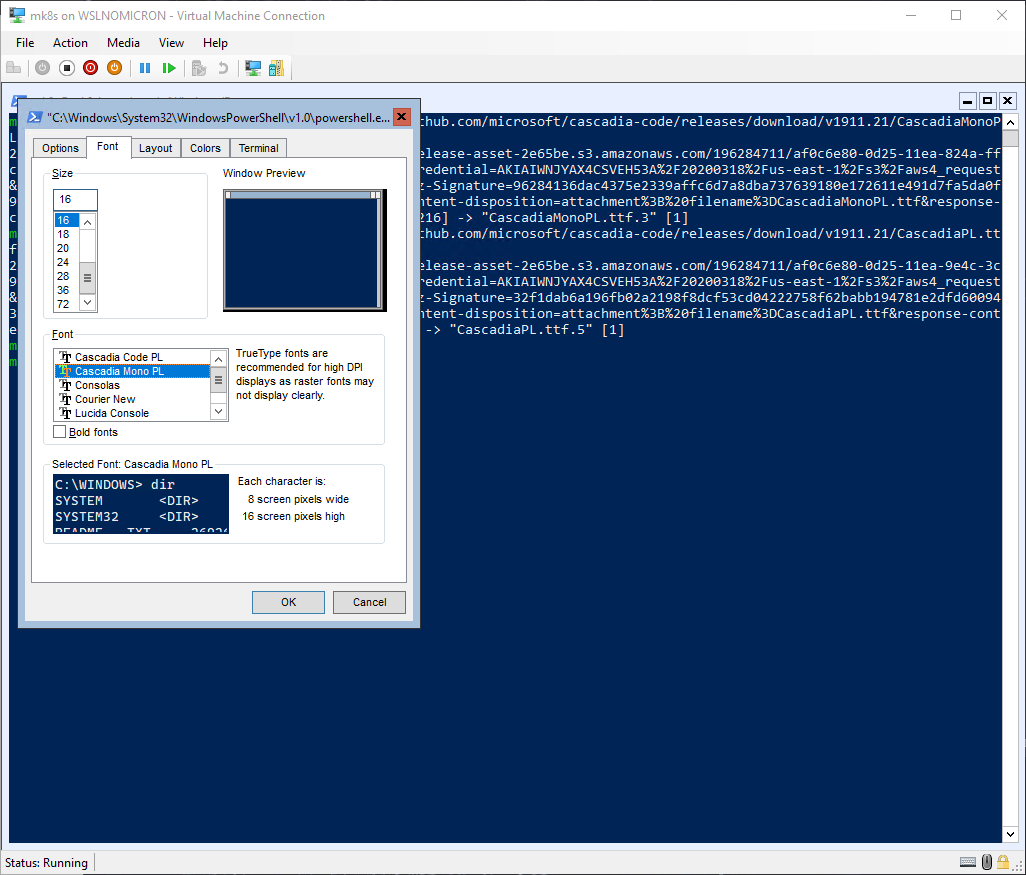
Close the registry and we are now able to select the fonts from the terminal properties (right click on the title bar > Properties)
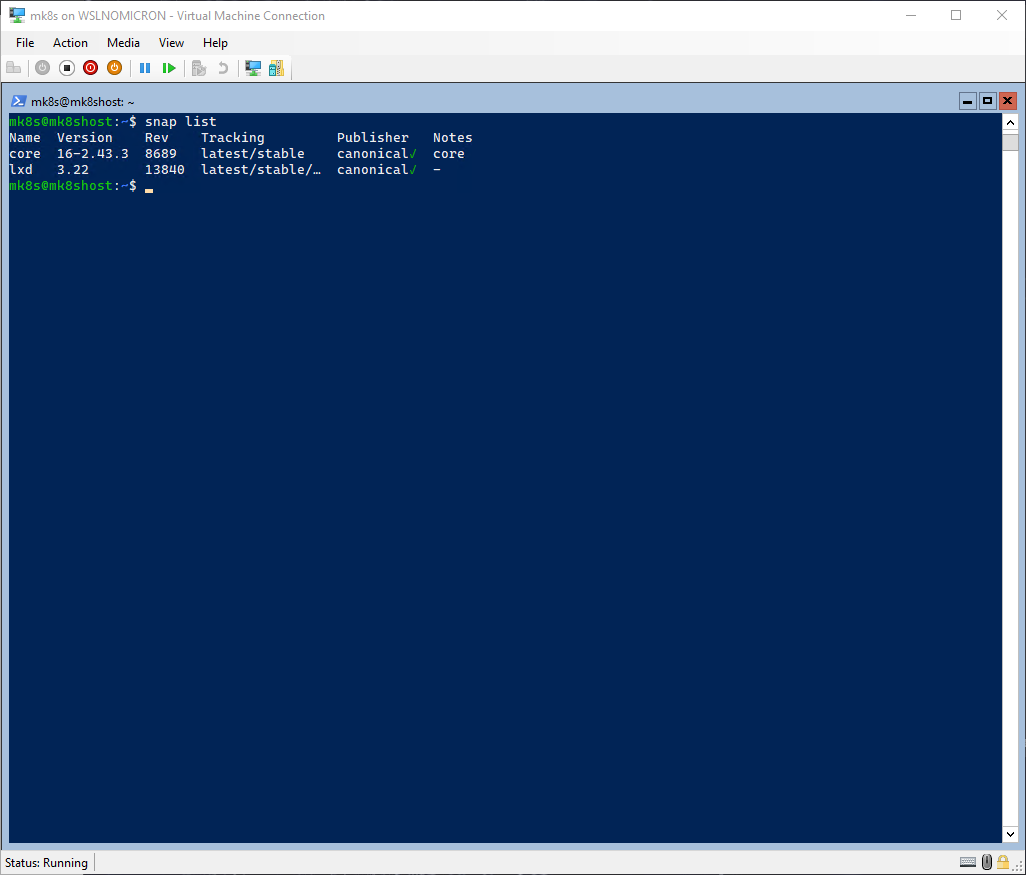
And now, let’s run again the snap list command and enjoy new characters:
Installing Microk8s
Before installing Microk8s snap, we can (should) have a look on the available Kubernetes versions and make sure the “latest/stable” version is the one we want/need:
# List all the information from the Microk8s snap
snap info microk8s
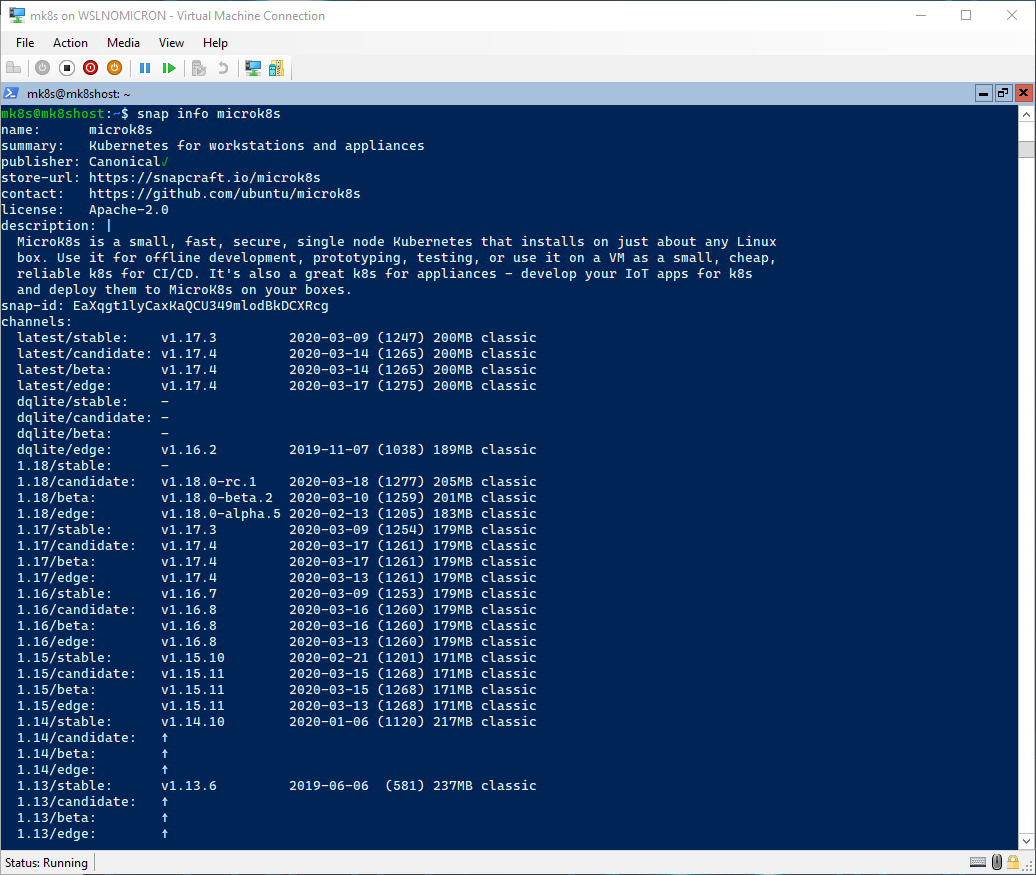
At the writing of this blog post, the “latest/stable” version is 1.17.3, which is perfectly fine, so let’s install this version:
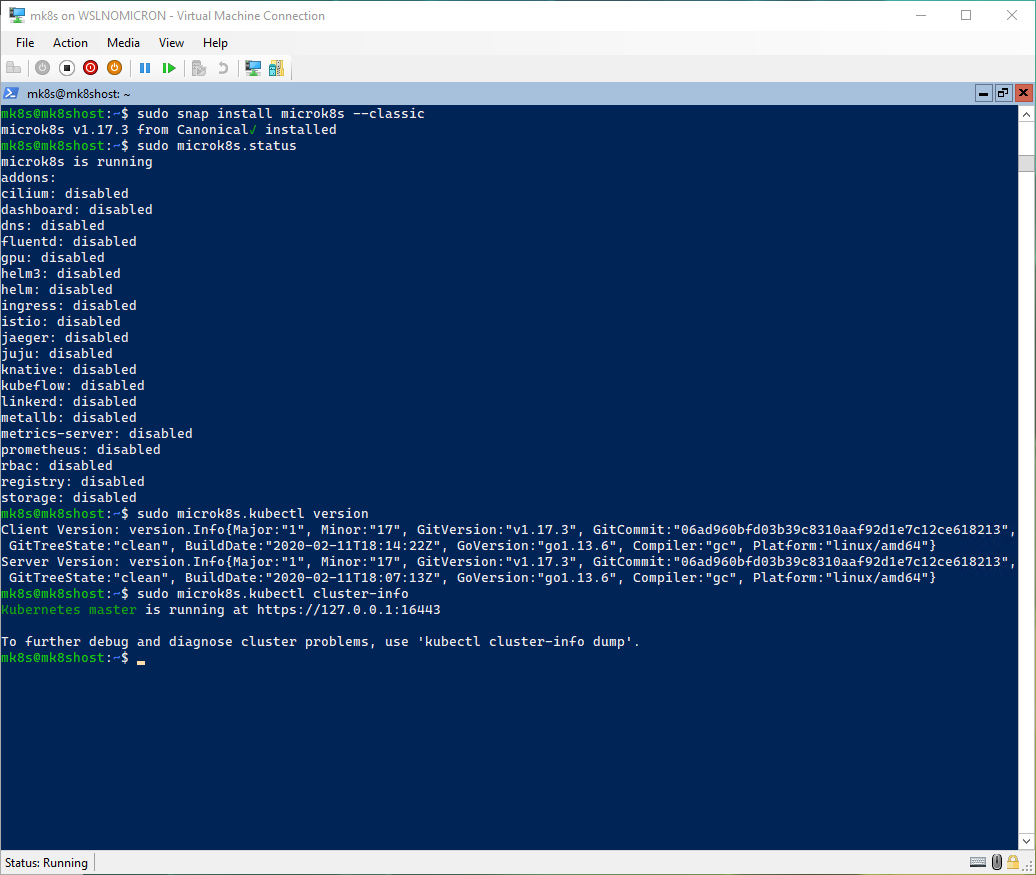
# Install the "latest/stable" version
sudo snap install microk8s --classic
# Check the status from Microk8s > this might take 1 or 2 minutes
sudo microk8s.status
# Check the Kubernetes version installed (client & server)
sudo microk8s.kubectl version
# Check that the cluster is running correctly
sudo microk8s.kubectl cluster-info
[Optional] Snap channels
Installing the default is maybe not the preferred route, specially when dealing with the different Kubernetes versions and the potential breaking changes a specific version introduced.
Of course, the other way around is also true, we might want to have a look, on our DEV cluster(s), for the latest version.
Thankfully, snap brings an update method really easy to perform by “refreshing” (read: update) the snap with a specific channel.
Here is the command for upgrading to the channel “1.18/candidate”:
# Refresh the Microk8s snap by selecting the channel "1.18/candidate"
sudo snap refresh microk8s --channel="1.18/candidate"
# Check the status from Microk8s > this might take 1 or 2 minutes
sudo microk8s.status
# Check the Kubernetes version installed (client & server) has been updated
sudo microk8s.kubectl version
# Check that the cluster is running correctly
sudo microk8s.kubectl cluster-info
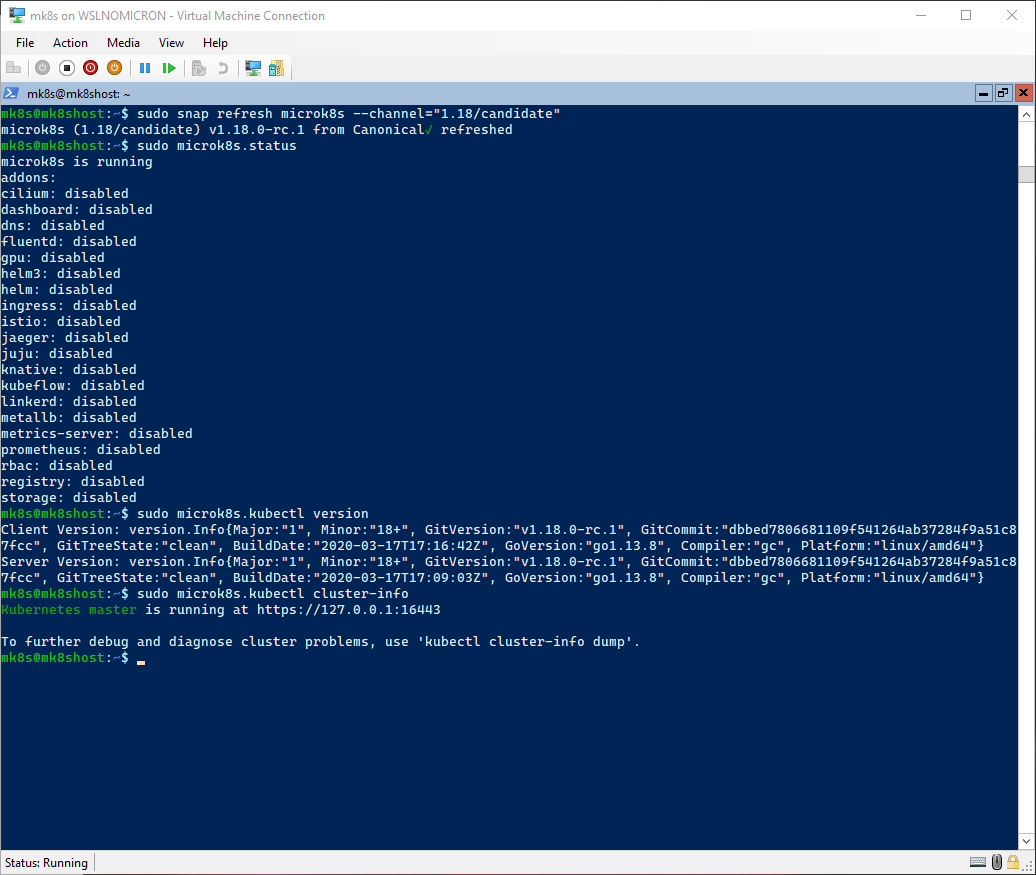
Great, in almost no time we moved from one channel to another. Try doing the same “the Kubernetes way” and you will appreciate very much this easiness and speed.
Fixing the permissions
As you can see in the previous commands, sudo was used in order to launch the microk8s command. This is of course not ideal and can be fixed:
# Try running the status command without sudo
microk8s.status
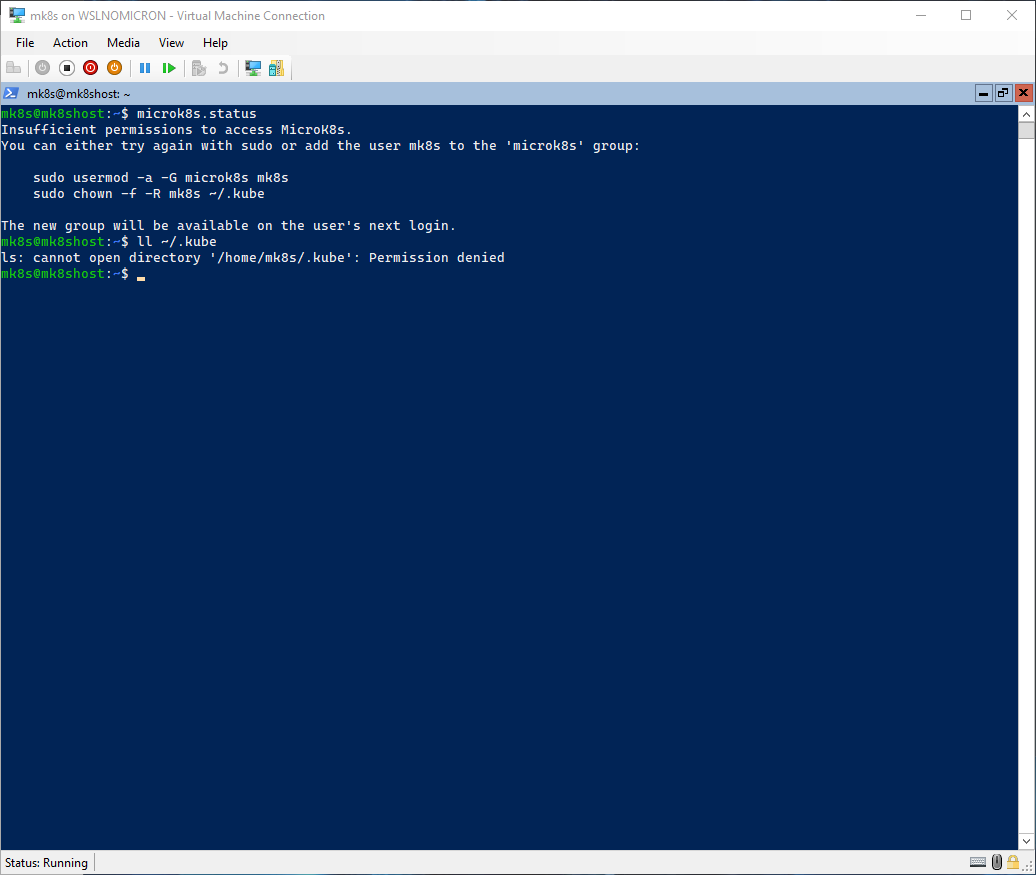
As expected, the command could not be run and, even worse, the directory .kube is now owned by root.
Hopefully, the error message explains exactly what should be done and if we read carefully, the error message explicitly states that the fix will only be available on the “user’s next login”:
# Add the user to the microk8s group
sudo usermod -a -G microk8s mk8s
# Set the ownership of the .kube directory back to the user
sudo chown -f -R mk8s ~/.kube
# Exit this session and enter again
exit
wsl
# Run the status command again
microk8s.status
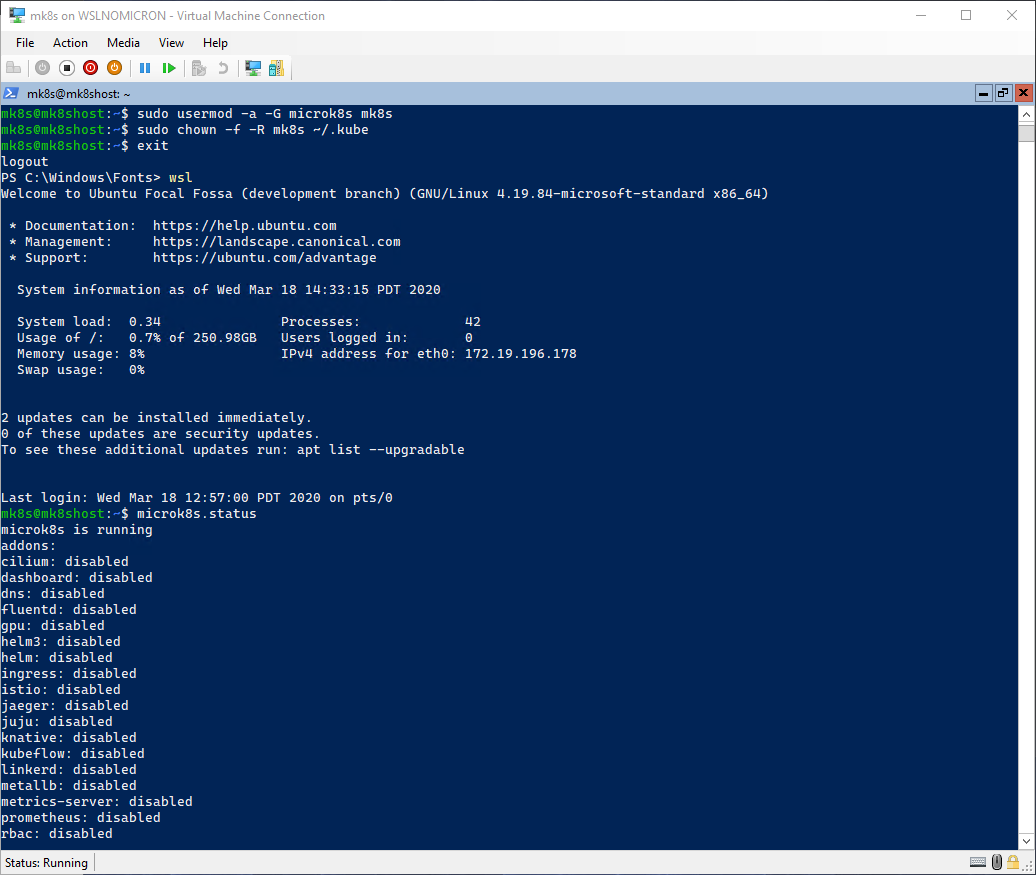
Enable addons
Now that we have our Microk8s one-node cluster running, let’s have a look at the available “addons”, which are Kubernetes services that are disabled by default.
By letting the users enable the addons needed, it allows microk8s to be lightweight. And even better, it’s one command to enable one or more addons at once:
# Let's enable the DNS and Dashboard addons
microk8s.enable dns dashboard
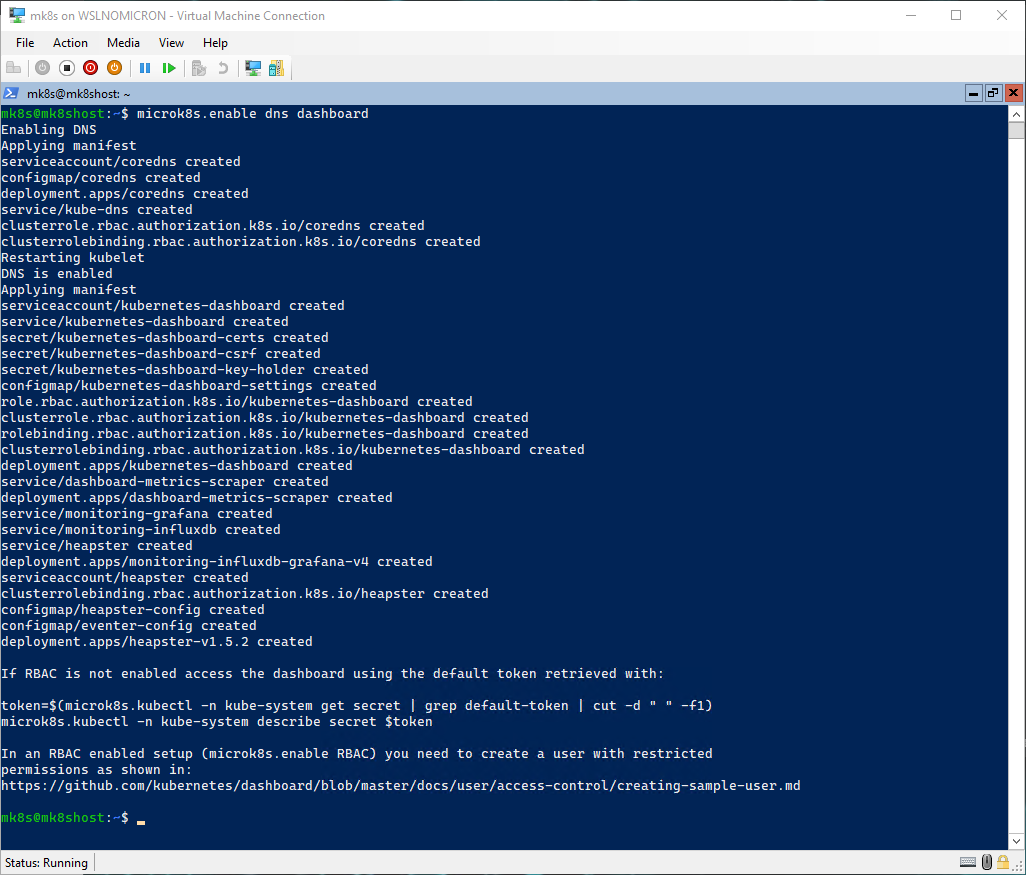
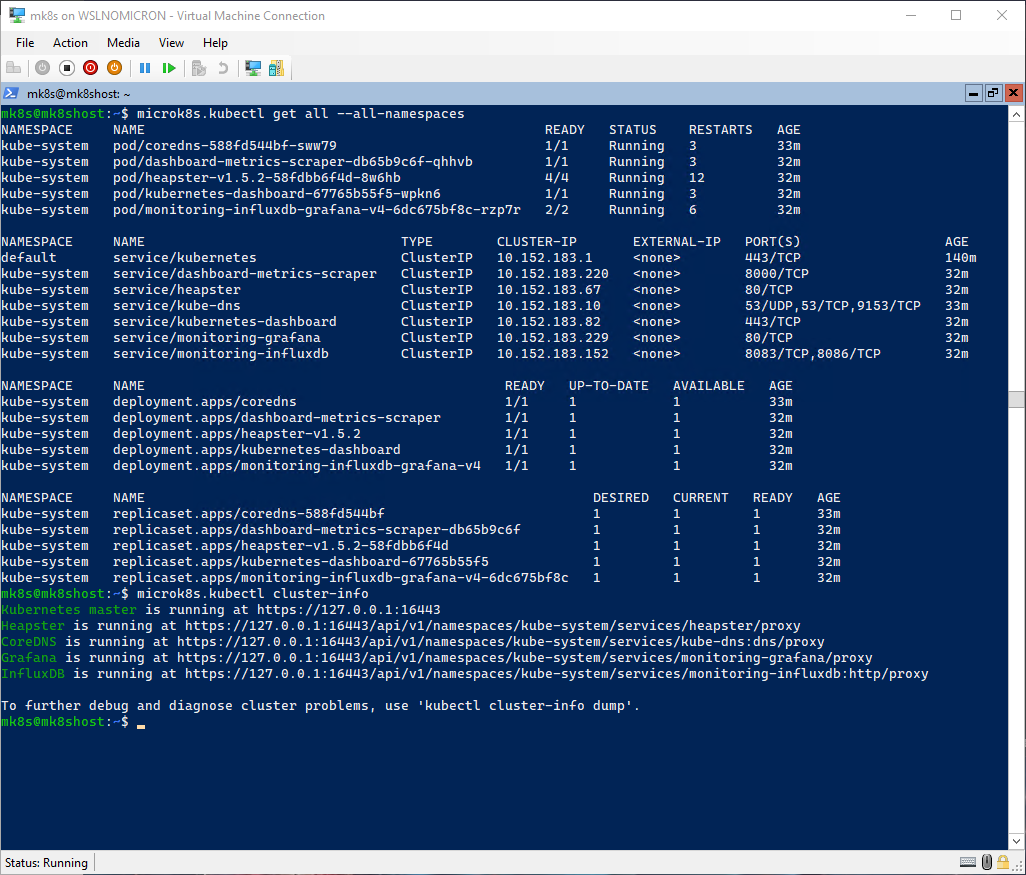
The addons have been enabled quite fast (specially for new installs), and we can check the services by using the kubectl command:
# Check all services that are running
microk8s.kubectl get all --all-namespaces
# Check the services enabled on the cluster
microk8s.kubectl cluster-info
[Optional] Install a browser and access the Dashboard
When we speak about dashboards, we think … well visuals, not terminal based.
In order to visualize the Kubernetes dashboard, when need a browser. At first, it can be a problem as there is no such thing in Windows Server core by default. So let’s install one, but first we will install one of the most known “package management” for Windows: Chocolatey
# Install Chocolatey > source: https://chocolatey.org/install
Set-ExecutionPolicy Bypass -Scope Process -Force; [System.Net.ServicePointManager]::SecurityProtocol = [System.Net.ServicePointManager]::SecurityProtocol -bor 3072; iex ((New-Object System.Net.WebClient).DownloadString('https://chocolatey.org/install.ps1'))
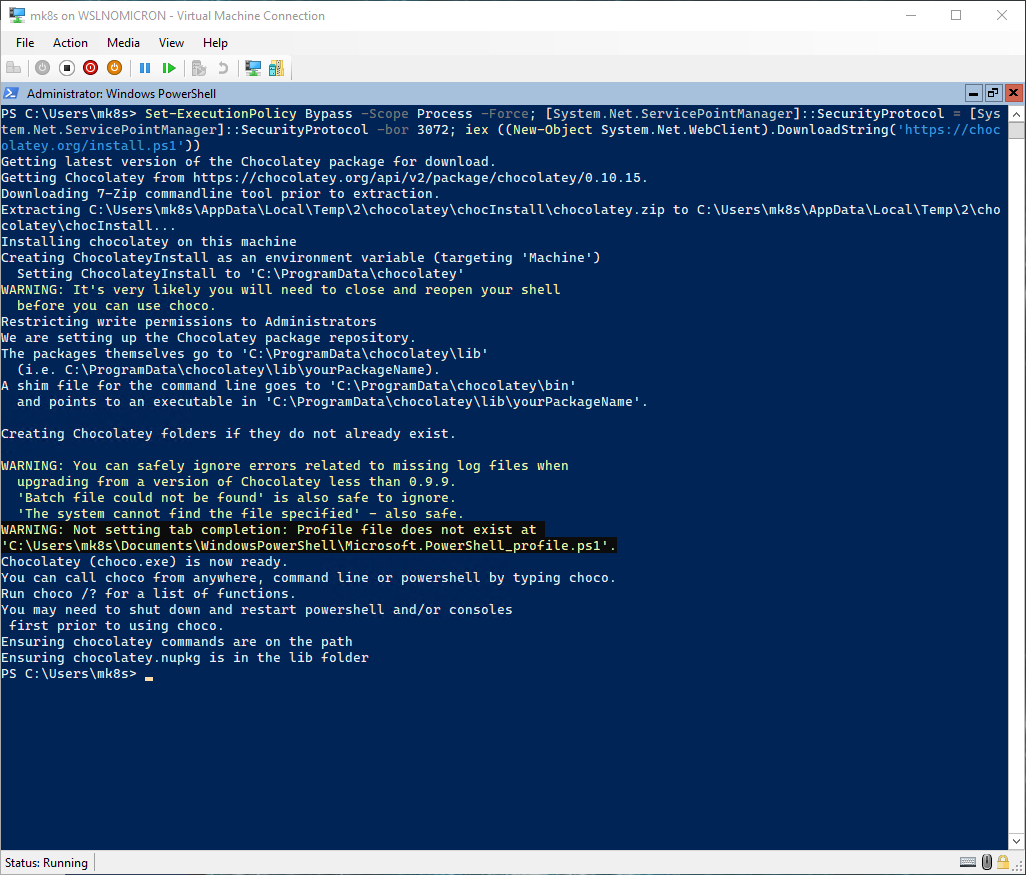
As written, we might need to restart our console before being able to use the command choco.
Once it’s done, we can now install a browser. The choice is actually quite simple, not all browsers will work as Windows Server Core is missing several “desktop interface” parts.
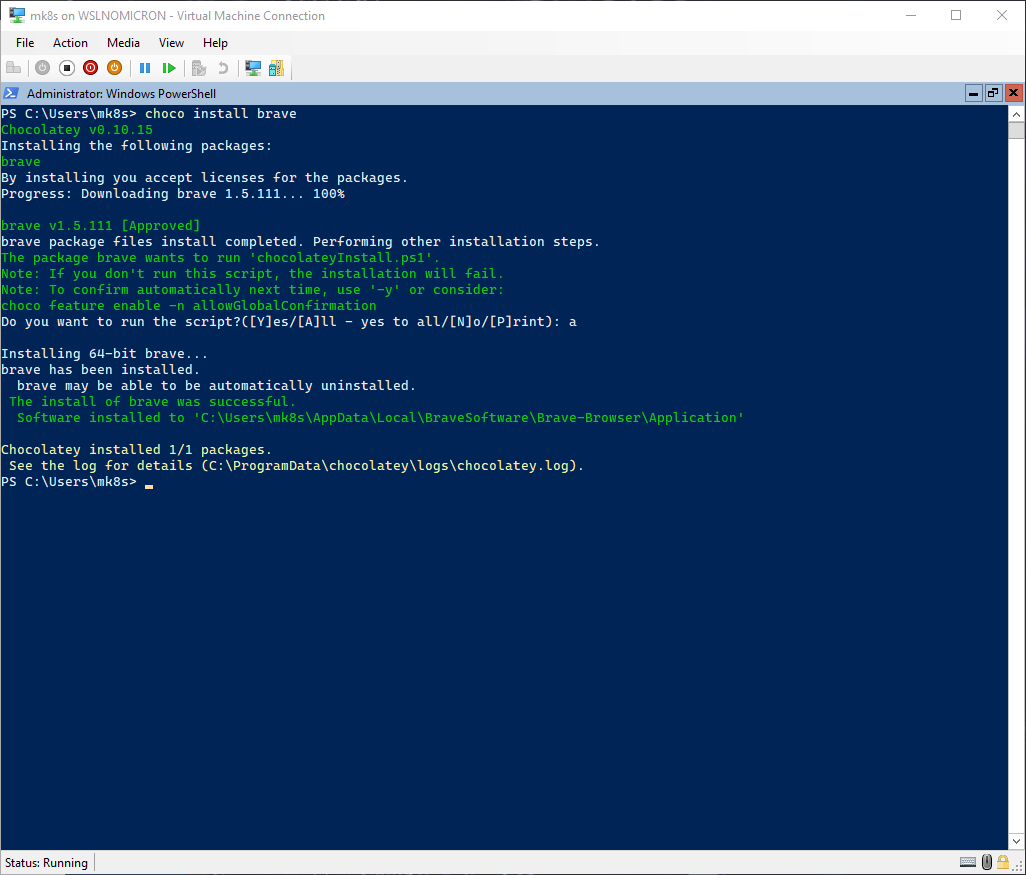
After few tests, the one I will installed is Brave browser:
# Install Brave browser > press "a" when asked for running the Install scripts
choco install brave
Tip: Brave browser is installed in
${HOME}\AppData\Local\BraveSoftware\Brave-Browser\Application\brave.exeTip 2: to start it from Powershell, run
& ${HOME}\AppData\Local\BraveSoftware\Brave-Browser\Application\brave.exeTip 3: to avoid going back and forth between Powershell and WSL, we can set the
$BROWSERvariable to the Brave path:export BROWSER=/mnt/c/Users/mk8s/AppData/Local/BraveSoftware/Brave-Browser/Application/brave.exe"I recommend adding it to the${HOME}/.bashrcfile
We have now a browser, so let’s try to access the Kubernetes management URL (https://localhost:16443):
# Get the services enabled on the cluster
microk8s.kubectl cluster-info
# Open the Kubernetes management site > replace 127.0.0.1 by localhost
$BROWSER https://localhost:16443
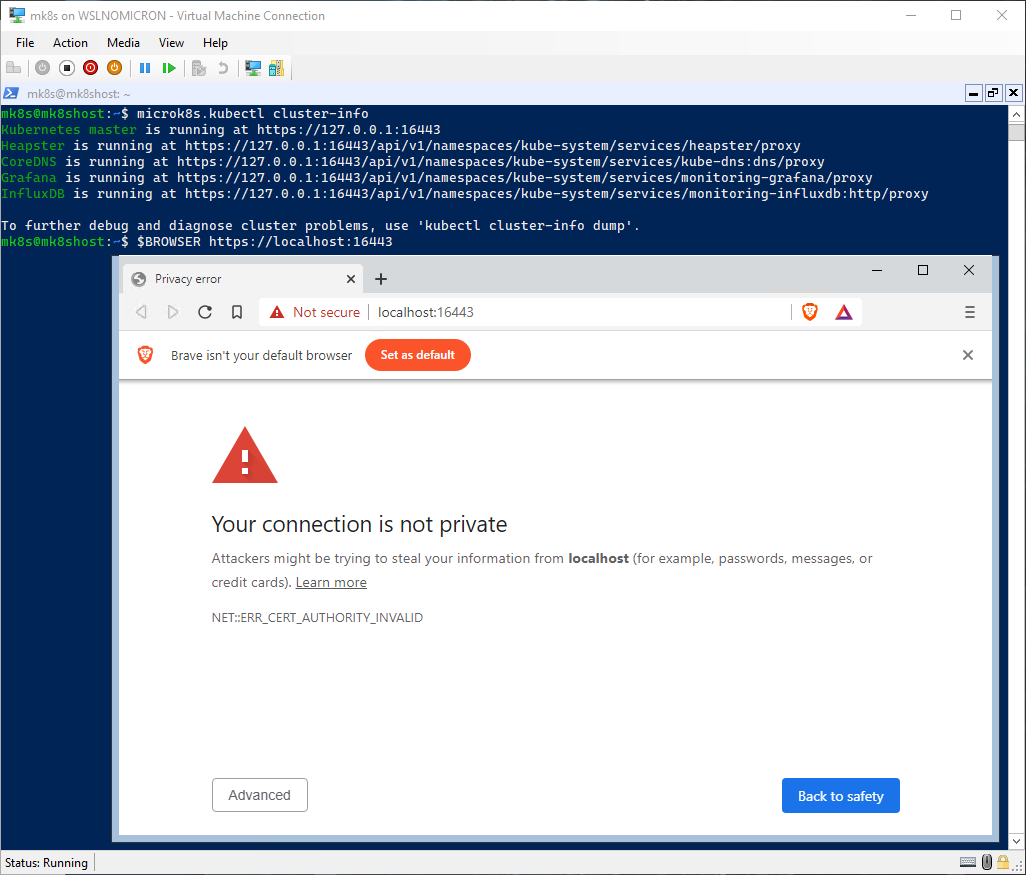
Success! What we can see here is that the port 16443 open on the WSL2 VM, has been correctly forwarded to the Windows side.
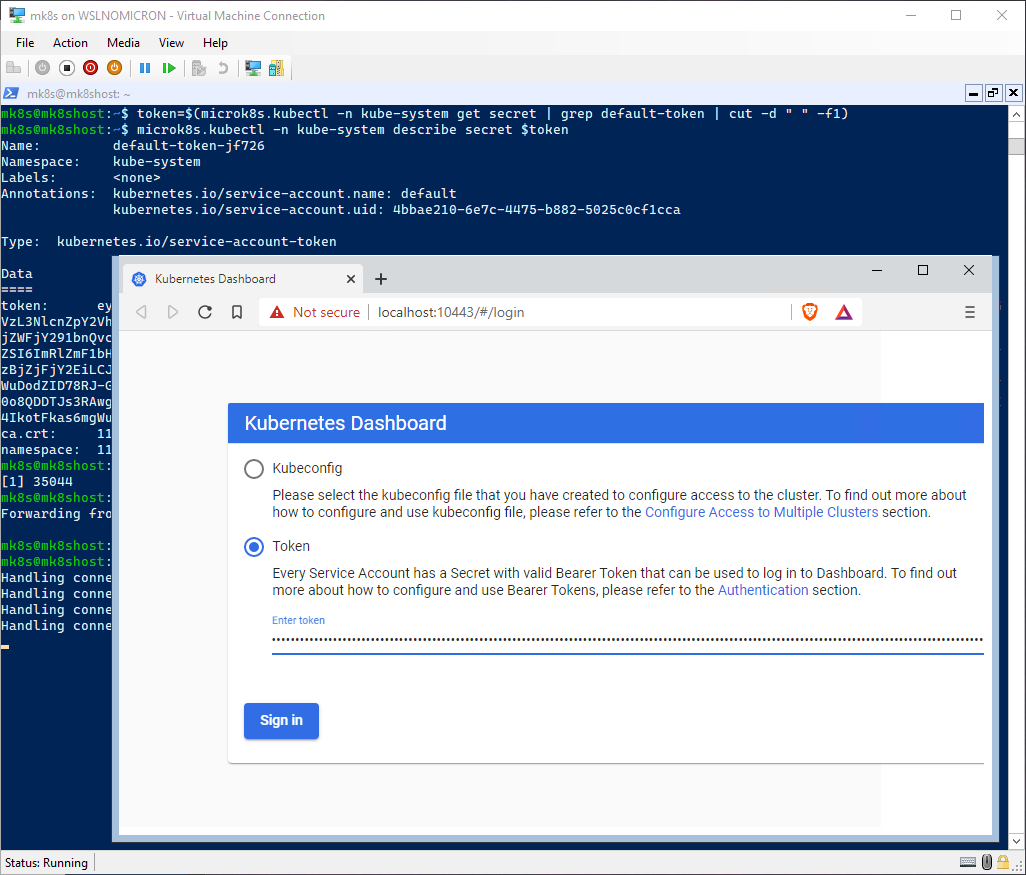
Let’s open the Dashboard:
# Get the access token to be able to login into the Dashboard
token=$(microk8s.kubectl -n kube-system get secret | grep default-token | cut -d " " -f1)
microk8s.kubectl -n kube-system describe secret $token
# Select the token value and right click to copy
# Currently the Dashboard is only accessible via the ClusterIP, so let's forward a port to access it externally
microk8s.kubectl port-forward -n kube-system service/kubernetes-dashboard 10443:443 &
# Open https://localhost:10443 in the browser
$BROWSER https://localhost:10443
# Click Advanced > Click Proceed to Localhost > Choose Token and past your token
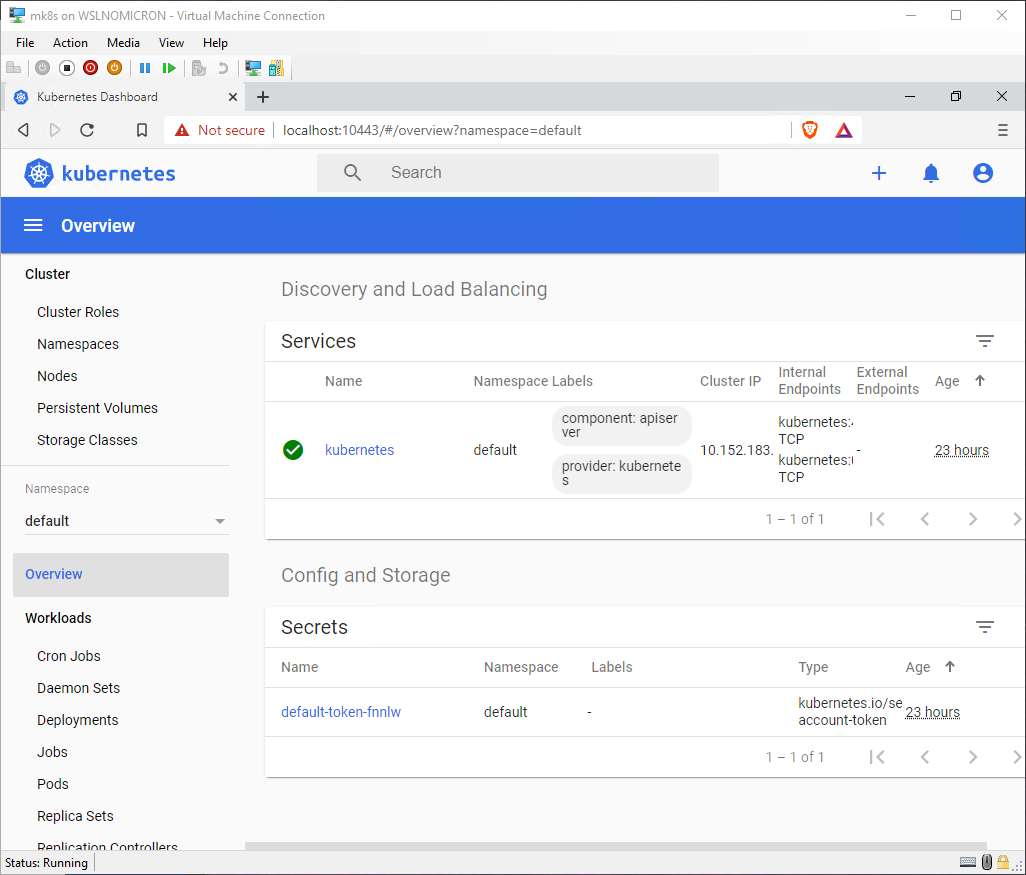
Once you click Sign in you will arrive at the “Overview” section of the Dashboard
Enable Metallb
Having to manually forward every port for our applications is of course not optimal. In order to avoid doing it and instead have fully automated solution that will provide us with an external IP, let’s install another module: Metallb.
Metallb will take addresses from a virtual pool, so before you install it, we will decide on a range to be used.
As we are in the WSL2 VM, we will take addresses in the same range as our main IP, like that we know it will be accessible from Windows also:
# Get the WSL2 VM main IP
ifconfig eth0
# Install Metallb addon
microk8s.enable metallb
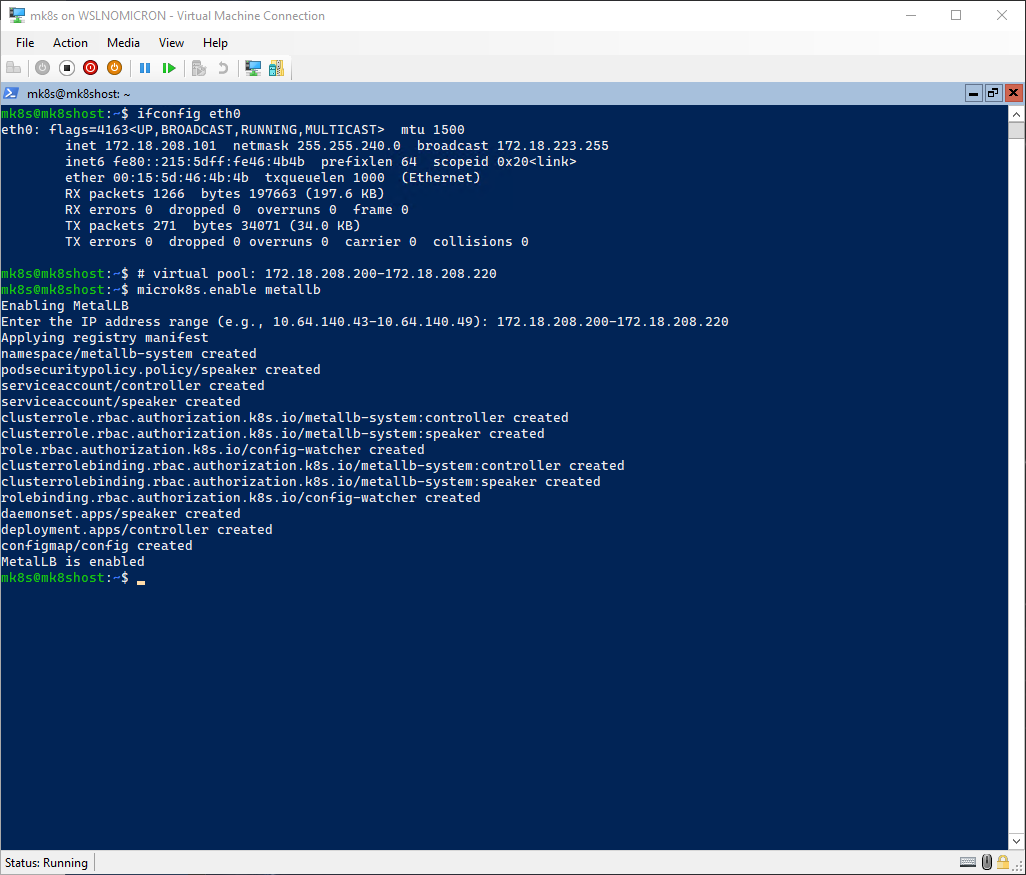
Tip: This address will refresh after each login. For a permanent solution, create a virtual interface with a static IP address as explained later in this blog post.
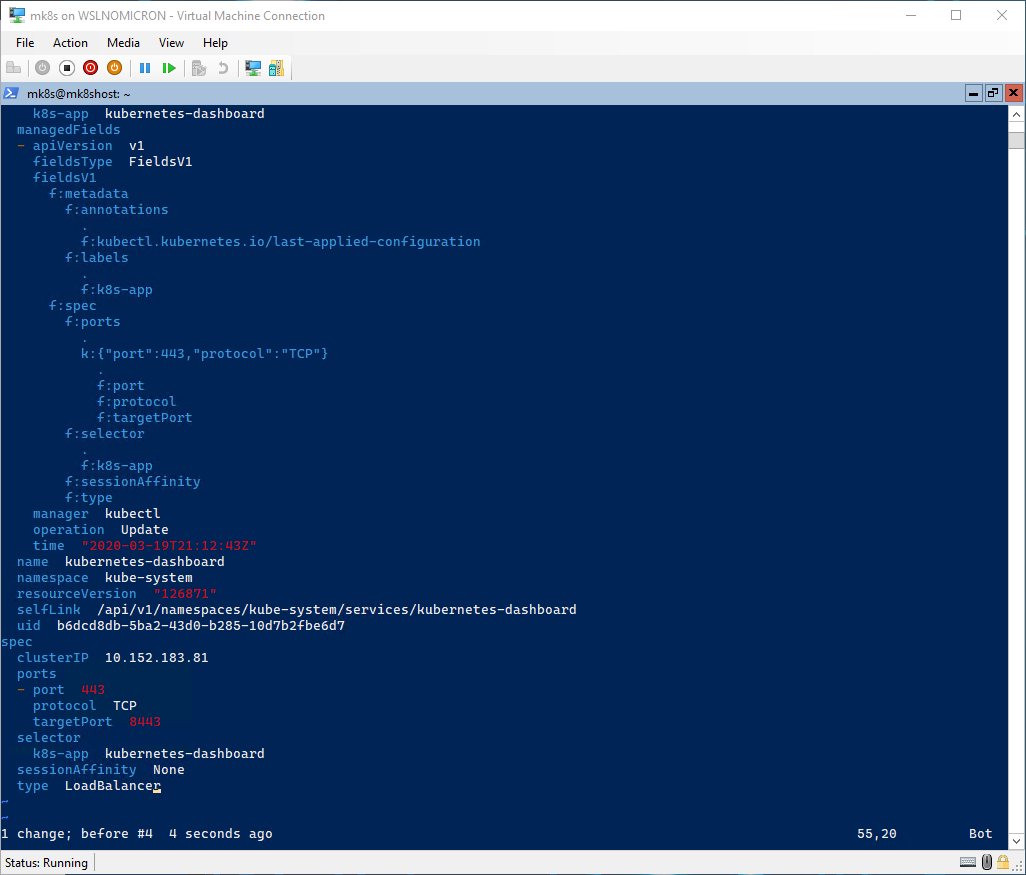
We have now a LoadBalancer, so let’s use it already by updating the Dashboard service to leverage it:
# Get the current status of the Dashboard service
microk8s.kubectl get service/kubernetes-dashboard -n kube-system
# Edit the service to use the LoadBalancer
microk8s.kubectl edit service/kubernetes-dashboard -n kube-system
# Delete the last two lines and edit the "type" from ClusterIP to LoadBalancer
# Check the updated service and copy the exported port
microk8s.kubectl get service/kubernetes-dashboard -n kube-system
# Browse to https://localhost:<external port>
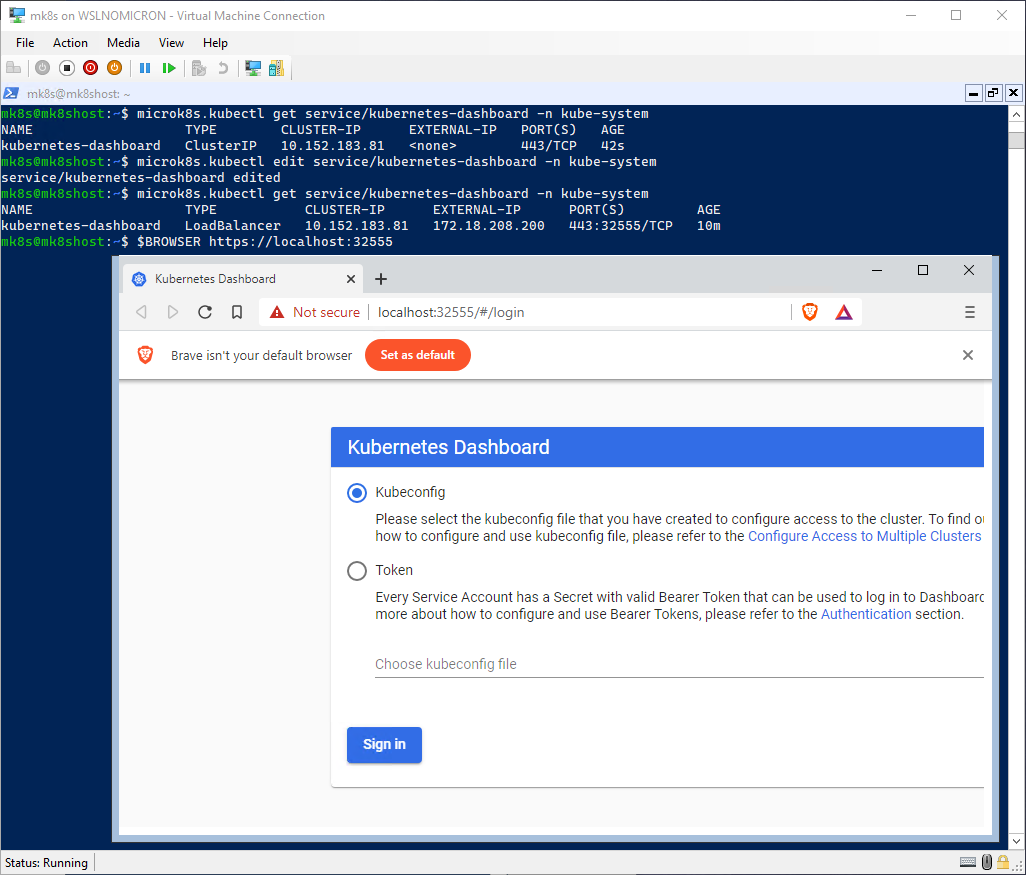
And here we have, the service was exported with an external port, and it allowed us to connect to the Dashboard.
Conclusion for the single node
We have now a Microk8s one node cluster up and ready on Windows Server Core 2019.
Thanks to some initial settings, we could install Microk8s and few addons without any issues. And the actual network limitations that WSL2 has, could partially be lifted with port forwarding and the LoadBalancer. Giving us a more “integrated” experience.
Let’s now continue and implement what I did during the WSLConf demo, by adding two more nodes to our Microk8s cluster
Microk8s multi-node
Working with a Kubernetes single node cluster is, for the majority of us, quite enough as we are using it on our own laptops to develop Cloud Native applications and/or for learning how to use/manage Kubernetes.
However, for production systems, we will definitively be faced with Kubernetes multi-nodes clusters (if not multi-clusters).
Let’s see how we can have our (tiny) 3 nodes Microk8s cluster by “cheating” a bit the system and update our one node cluster configuration to welcome the 2 other nodes.
Windows setup
The first question is: how can we have multiple nodes if every distro runs inside the WSL2 VM, which means IPs and ports will be shared.
The answer is: “cheating” and spawning two others WSL2 VMs. Impossible you say? not for the Corsair!
Here is what will do: two additional, non-administrators, users will be created and WSL2 will be enabled in their user space. The result is that two others WSL2 VMs will be created with their own IPs and ports mapping.
You read that right, the same port open three times. However, remember that in our first node, we did forward the localhost ports to “windows side”, so some network configuration will be needed.
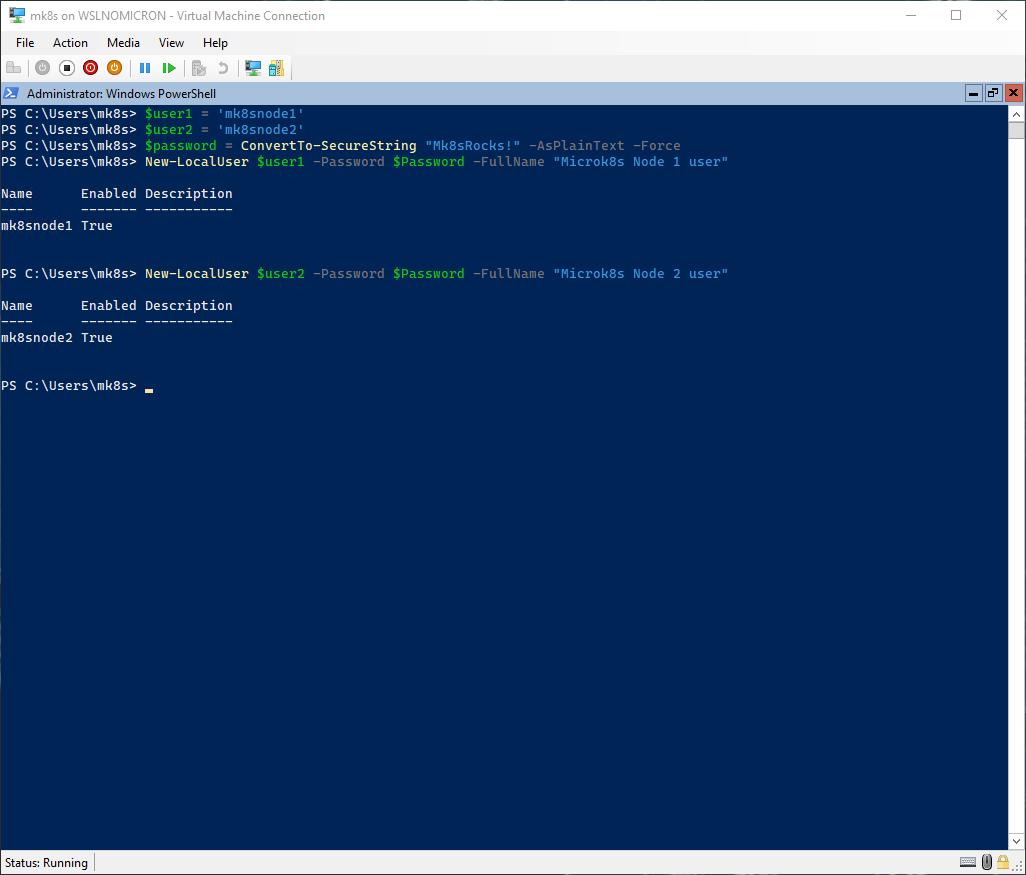
Enough theory, let’s jump into Powershell and create the two users:
# Create two variables with the usernames
$user1 = 'mk8snode1'
$user2 = 'mk8snode2'
# Create one variable for the password
$password = ConvertTo-SecureString "Mk8sRocks!" -AsPlainText -Force
# Create the users
New-LocalUser $user1 -Password $Password -FullName "Microk8s Node 1 user"
New-LocalUser $user2 -Password $Password -FullName "Microk8s Node 2 user"
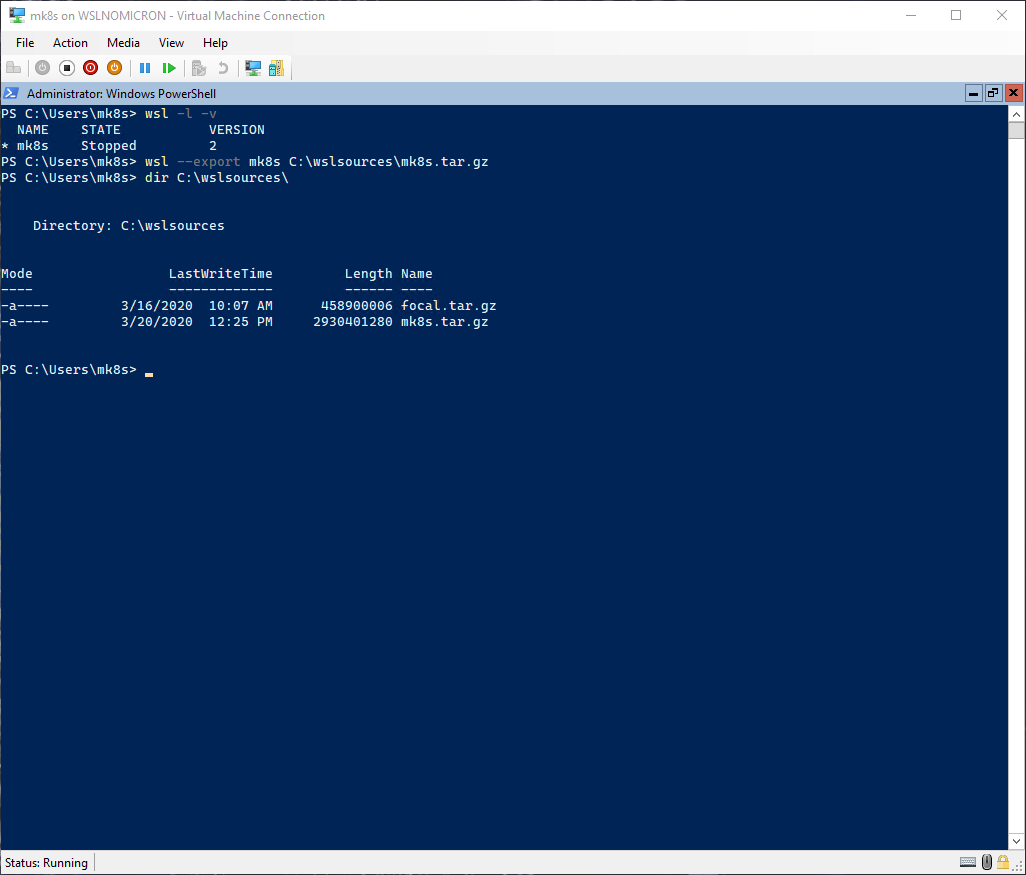
Before continuing with the users, let’s export the WSL2 distro from our first node, so we can import a configured distro:
# List the WSL distros, to check the right name
wsl -l -v
# Export the distro as a tar file into the WSL sources directory
wsl --export mk8s C:\wslsources\mk8s.tar.gz
# Check the exported file
dir C:\wslsources\
We have the final piece, so let’s resume the creation of our users and import the distro:
# Copy the password: Mk8sRocks!
# Start two powershell session with the new users > right click to paste the password
runas /user:$user1 /savecred powershell.exe
runas /user:$user2 /savecred powershell.exe
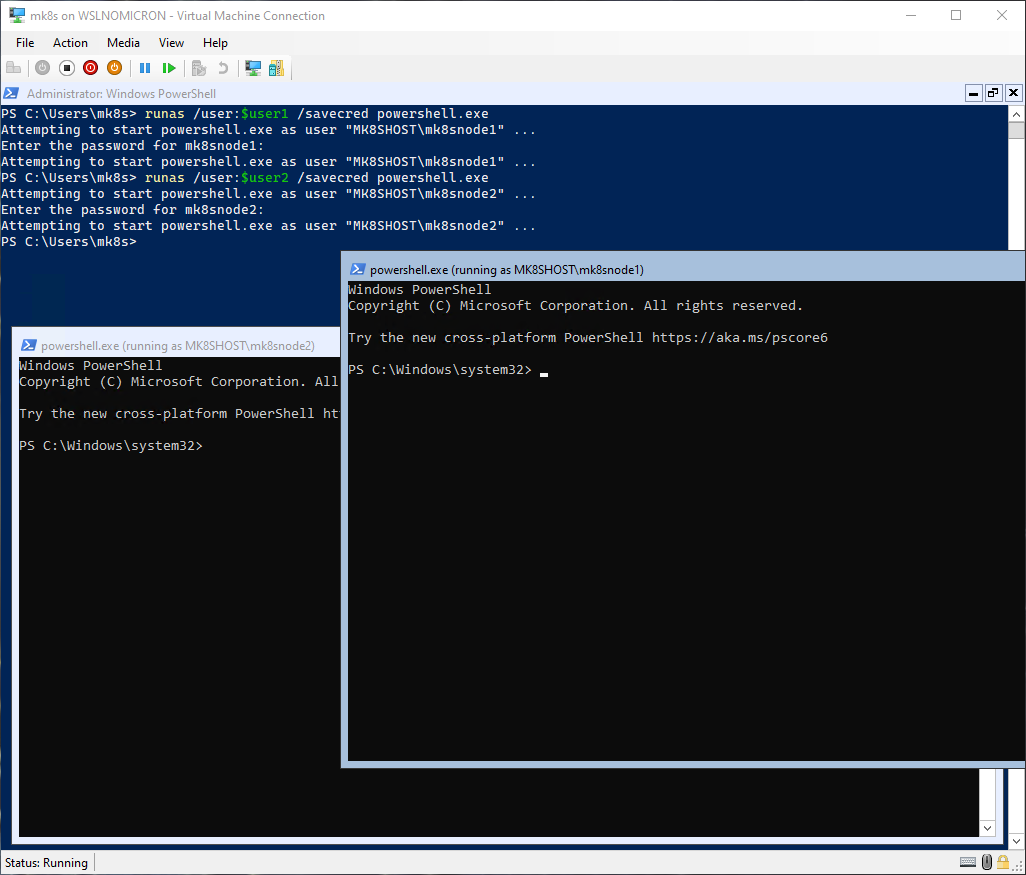
Tip: by default, the two terminals have the “consolas” font, now that we have already imported the new fonts, we can select them from the fonts menu
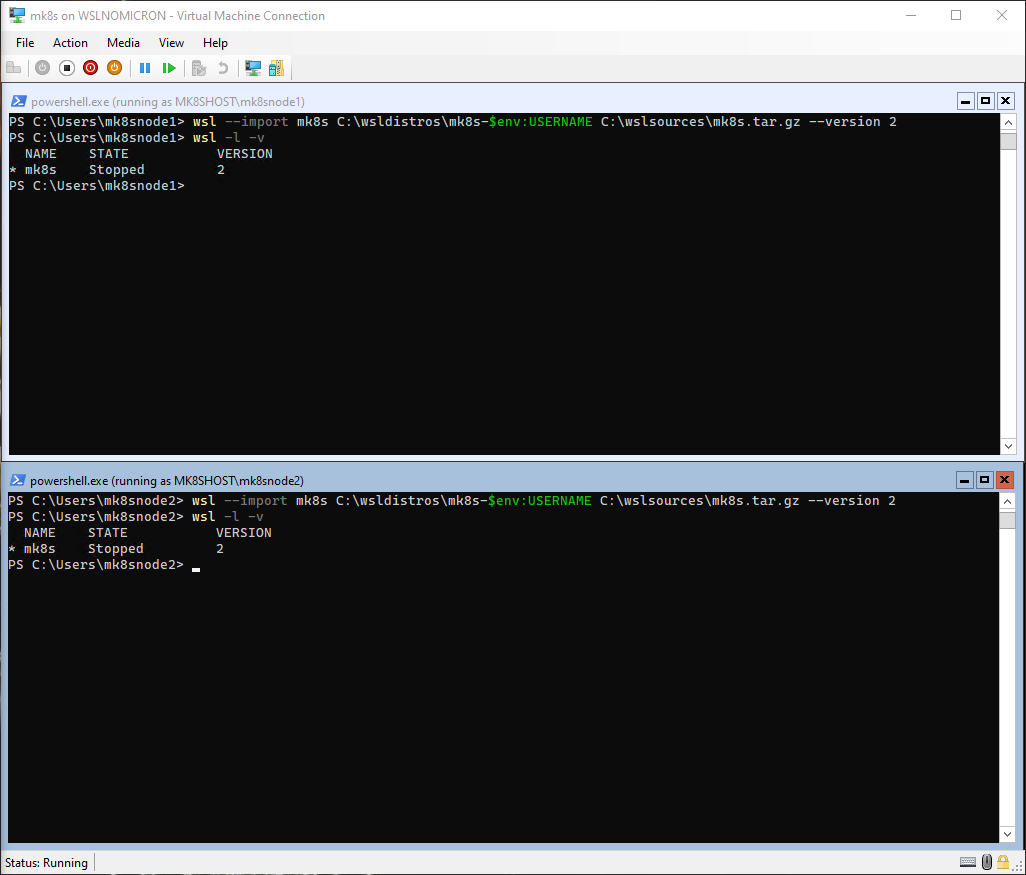
Once logged in, we can now import the distros for both users:
# Import the distro for both users > add the username to differentiate it
wsl --import mk8s C:\wsldistros\mk8s-$env:USERNAME C:\wslsources\mk8s.tar.gz --version 2
# List the WSL distros
wsl -l -v
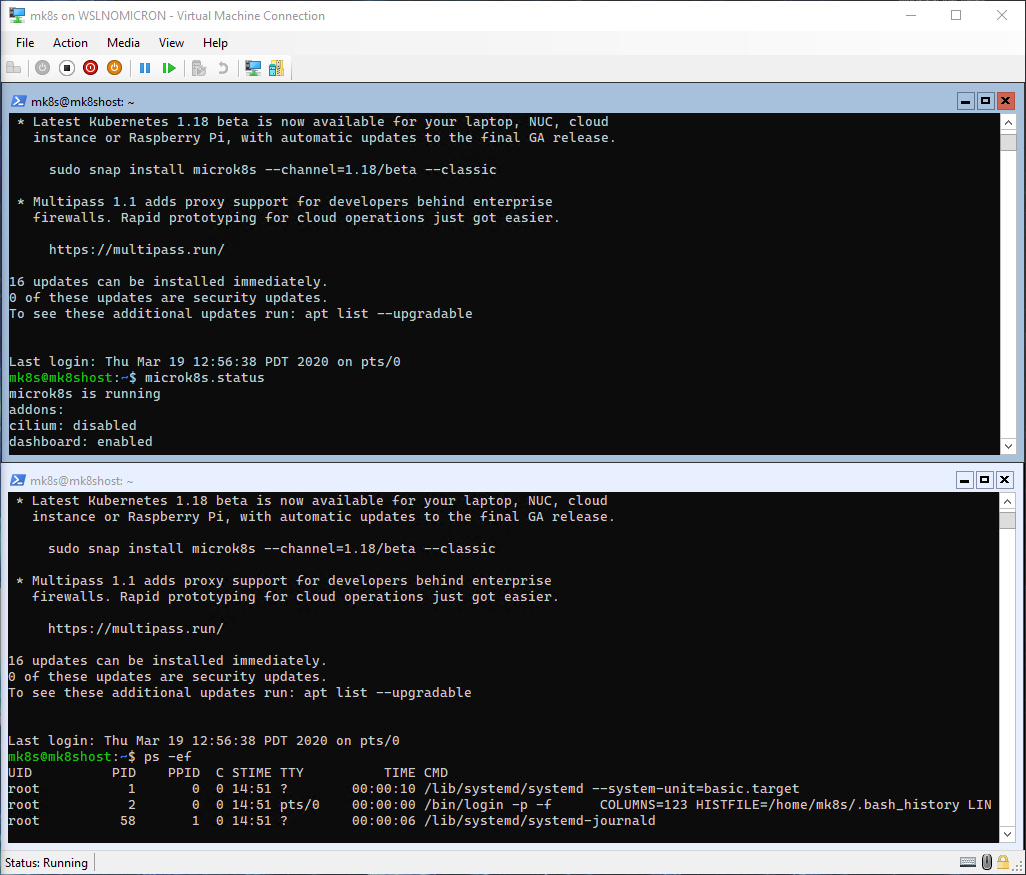
Let’s start our WSL sessions and see how fast it was to have a pre-installed distro:
# Start a new WSL session for both accounts
wsl
# Check if Microk8s is running
microk8s.status
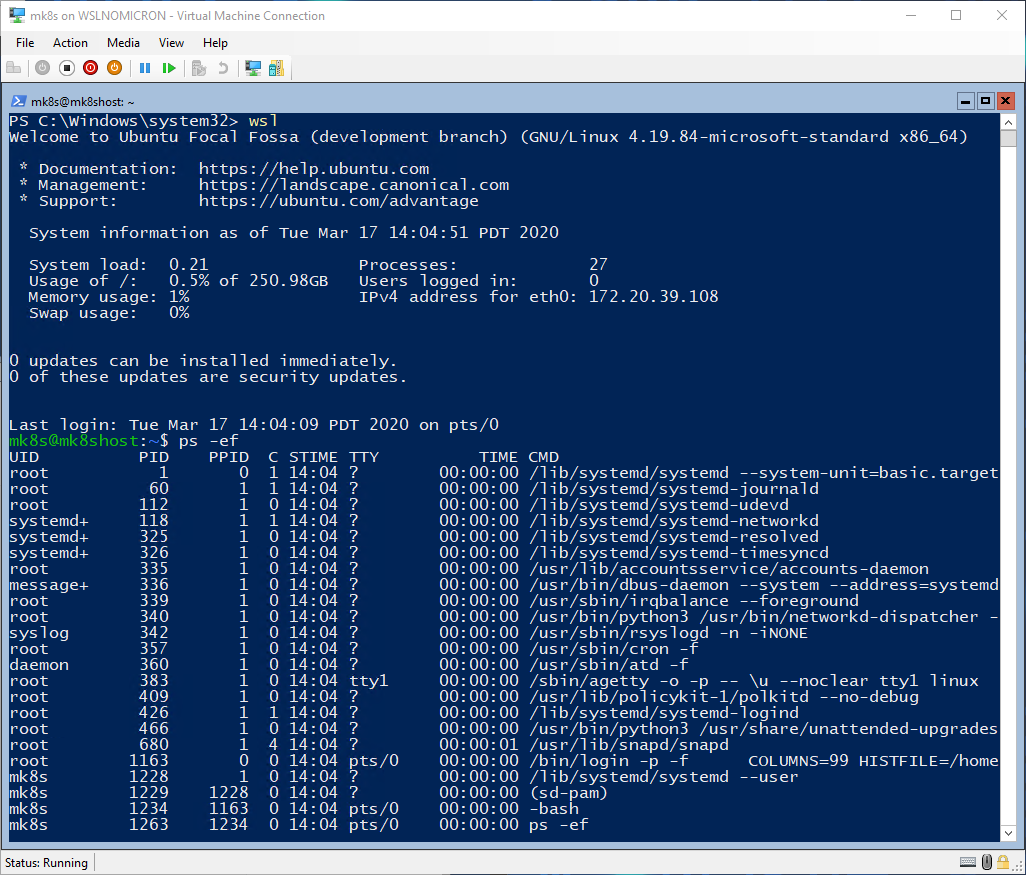
# Check the processes and confirm SystemD is also running
ps -ef
[IMPORTANT NOTICE]
DO NOT add localhostForwarding=true inside the file ${HOME}\.wslconfig on the worker nodes. This will cause the same ports to be forwarded to the host and when trying to access these ports on Windows side will result with an error.
Network setup
Ok, everything is working but we do want to add the worker nodes to our cluster and to be able to do that, we need some additional configuration change in order to have a stable cluster.
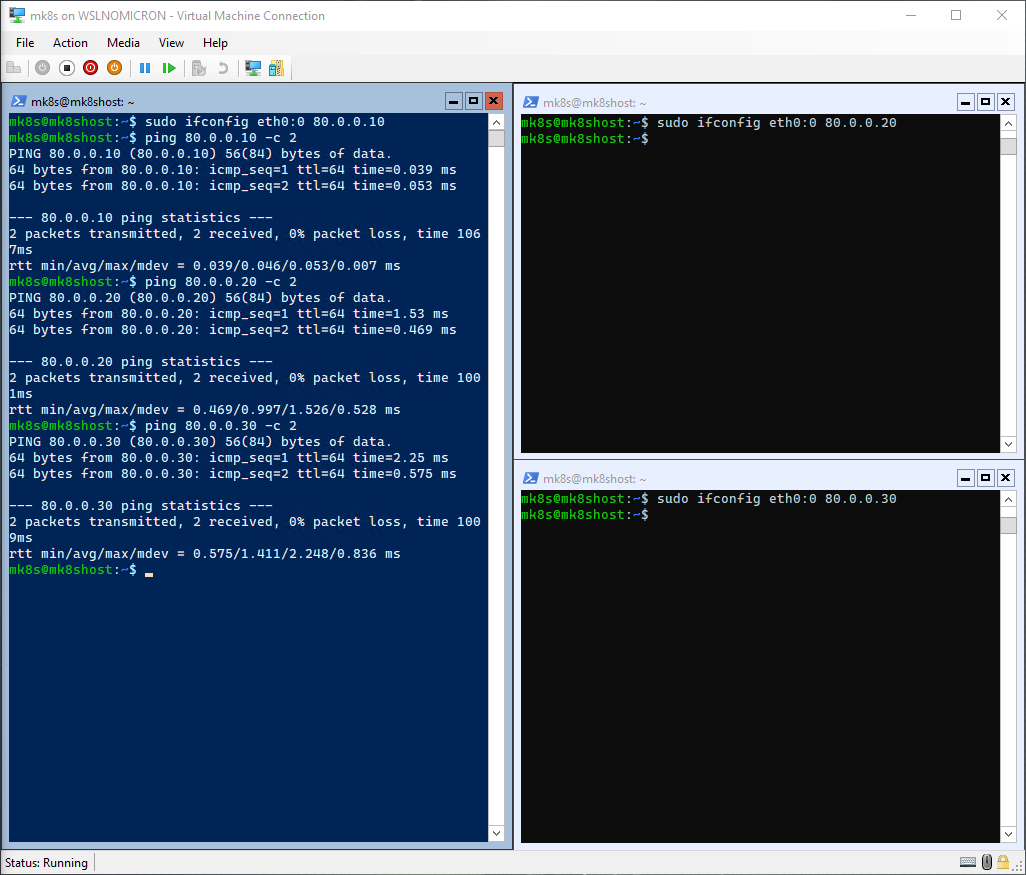
First, we will need to create static IPs so we can ensure we know how to reach each WSL instance. To do that, we will create a virtual interface based on eth0:
# Create a virtual interface > I separate the addresses by 10 for each WSL instance
# Master node:
sudo ifconfig eth0:0 80.0.0.10
# Worker node 1:
sudo ifconfig eth0:0 80.0.0.20
# Worker node 2:
sudo ifconfig eth0:0 80.0.0.30
# Check the addresses are reachable
ping 80.0.0.10 -c 2
ping 80.0.0.20 -c 2
ping 80.0.0.30 -c 2
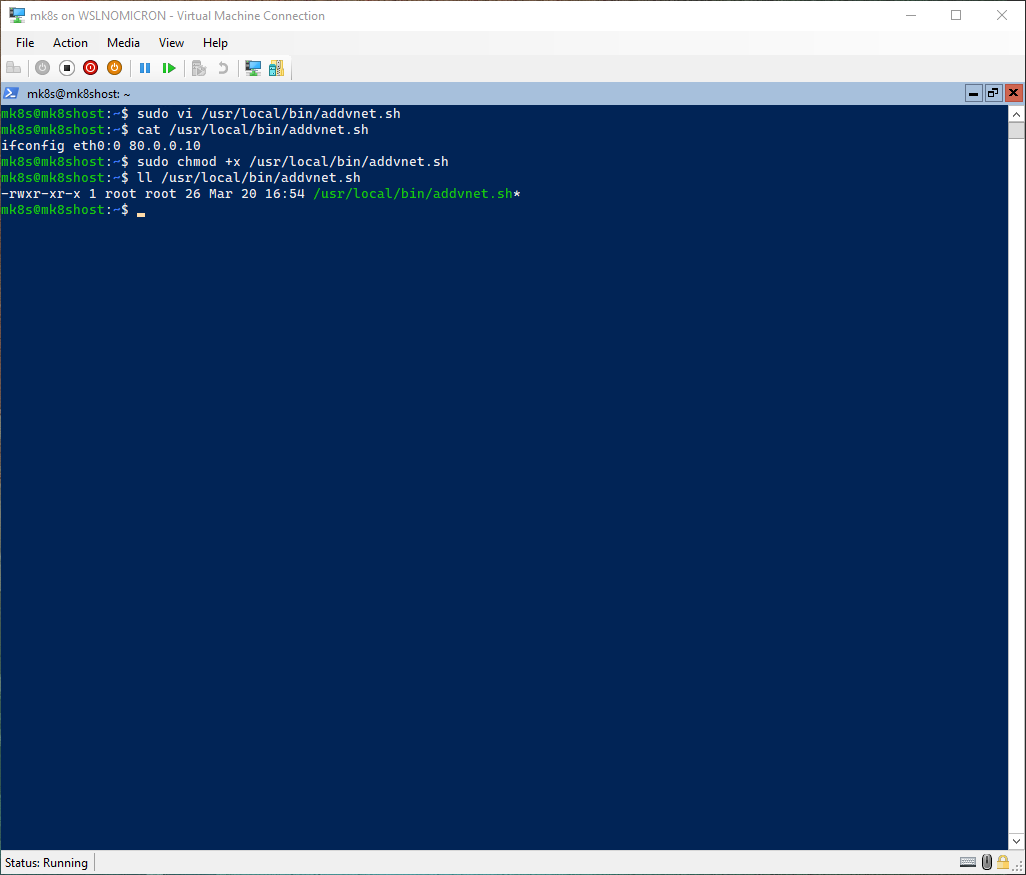
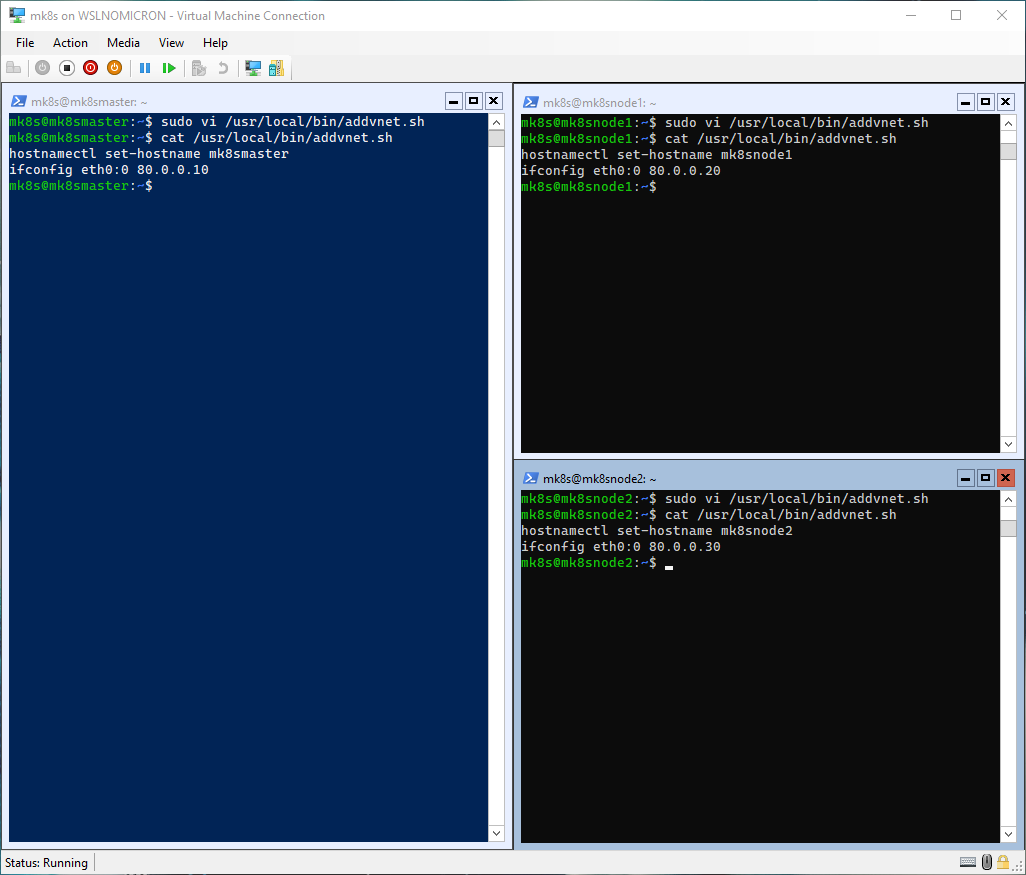
To make this virtual interface permanent, let’s create a script file and add it to /etc/bash.bashrc so it runs at each login:
# Create the script file for creating the virtual interface
sudo vi /usr/local/bin/addvnet.sh
# Set the file to be executable
sudo chmod +x /usr/local/bin/addvnet.sh
WSL Setup
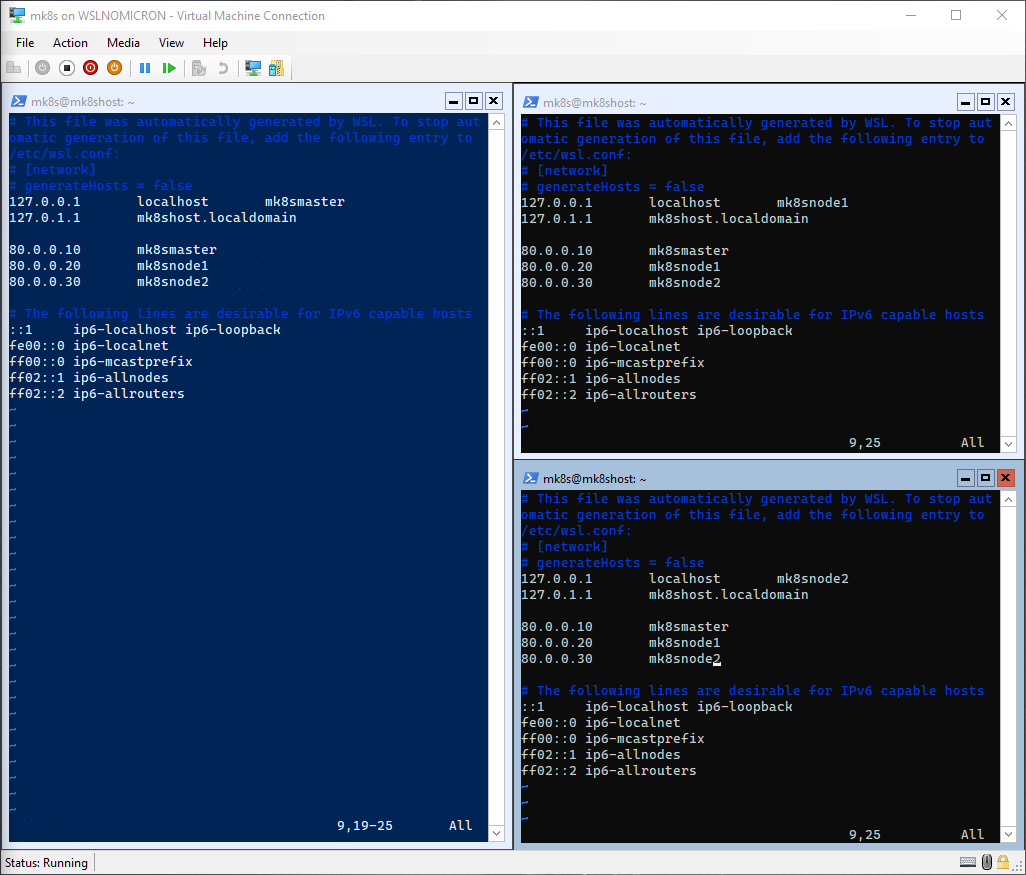
Second, we will need to change the hostname, because right now the three WSL instances have inherited the Windows hostname:
# Edit the /etc/hosts file to list
sudo vi /etc/hosts
# Master node:
127.0.0.1       localhost       mk8smaster
127.0.1.1       mk8shost.localdomain

80.0.0.10       mk8smaster
80.0.0.20       mk8snode1
80.0.0.30       mk8snode2
# Worker node 1:
127.0.0.1       localhost       mk8snode1
127.0.1.1       mk8shost.localdomain

80.0.0.10       mk8smaster
80.0.0.20       mk8snode1
80.0.0.30       mk8snode2
# Worker node 2:
127.0.0.1       localhost       mk8snode2
127.0.1.1       mk8shost.localdomain

80.0.0.10       mk8smaster
80.0.0.20       mk8snode1
80.0.0.30       mk8snode2
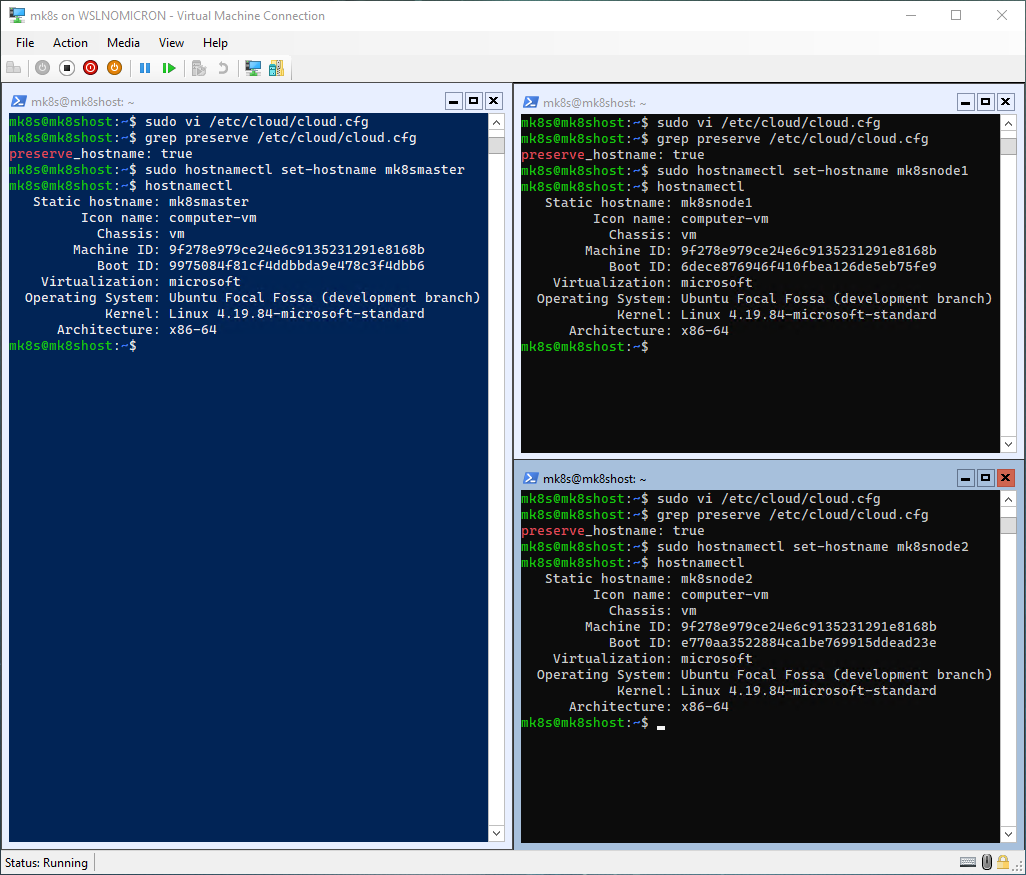
As we are running SystemD, we will need to change the cloud-init configuration file in order to allow the hostname change with hostnamectl to be persistent:
# Edit the /etc/cloud/cloud.cfg file
sudo vi /etc/cloud/cloud.cfg
# Change the value of preserve_hostname to "true"
preserve_hostname: true
# Change the hostname with the command hostnamectl
# Master node:
sudo hostnamectl set-hostname mk8smaster
# Worker node 1:
sudo hostnamectl set-hostname mk8snode1
# Worker node 2:
sudo hostnamectl set-hostname mk8snode2
# Check if the change has been correctly applied
hostnamectl
Tip: our bash prompt still shows the “old” hostname, to update it, just exit and start a new WSL session.
Tip2: after a shutdown of the WSL2 VM, the first login will display an error, just logout and login again
Due to the WSL2 init system, we need to make a last change to make the hostname permanent by adding the hostnamectl command to a script running during the “boot”.
To avoid to many scripts, let’s add the command to the same script creating the virtual interface:
# Edit the addvnet.sh script
sudo vi /usr/local/bin/addvnet.sh
# Add the hostnamectl command
# Master node:
hostnamectl set-hostname mk8smaster
# Worker node 1:
hostnamectl set-hostname mk8snode1
# Worker node 2:
hostnamectl set-hostname mk8snode2
Creating the cluster
Everything is now ready and we can finally create the cluster by joining the worker nodes to the master node.
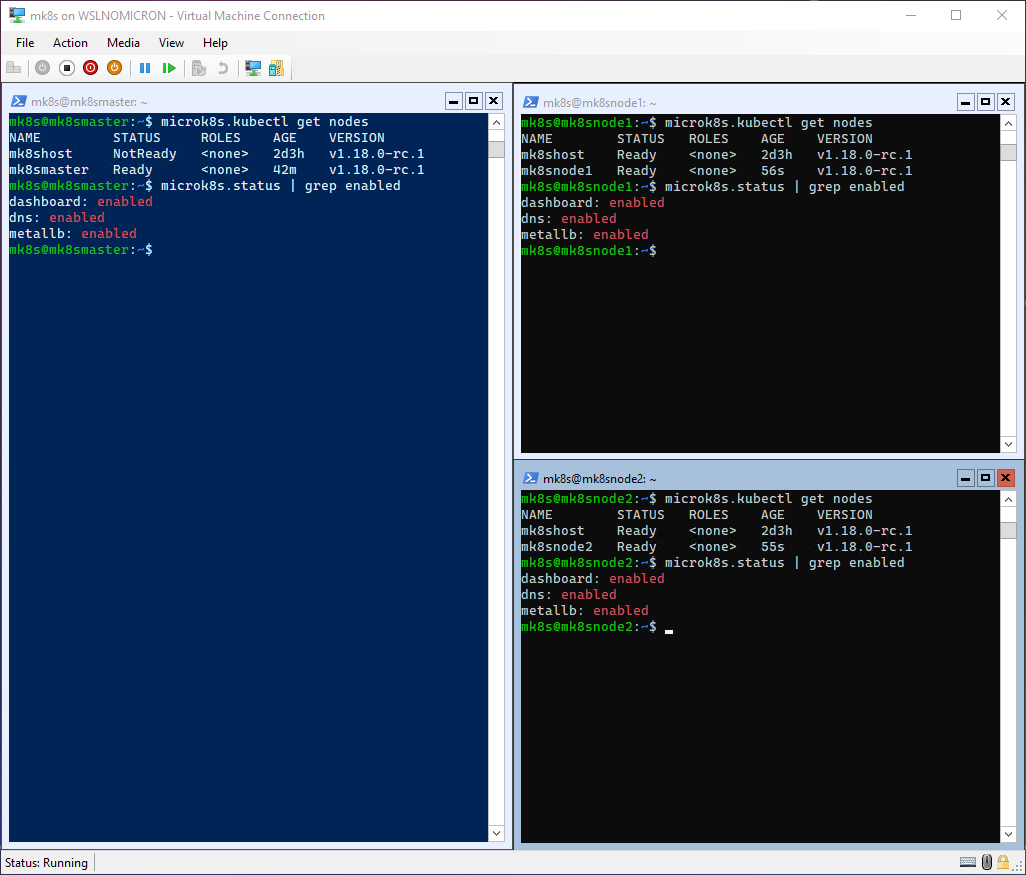
Let’s see the current state of each node:
# Get the list of nodes
microk8s.kubectl get nodes
# Get the addons enabled
microk8s.status | grep enabled
Let’s add the two worker nodes:
# Run the add-node command on the Master node
microk8s.add-node
# Run the join command on the Worker node 1 > choose the virtual IP
microk8s.join <MasterIP>:25000/<serial>
# Run the add-node command on the Master node again
microk8s.add-node
# Run the join command on the Worker node 2 > choose the virtual IP
microk8s.join <MasterIP>:25000/<serial>
# Run the get nodes on the three nodes
microk8s.kubectl get nodes
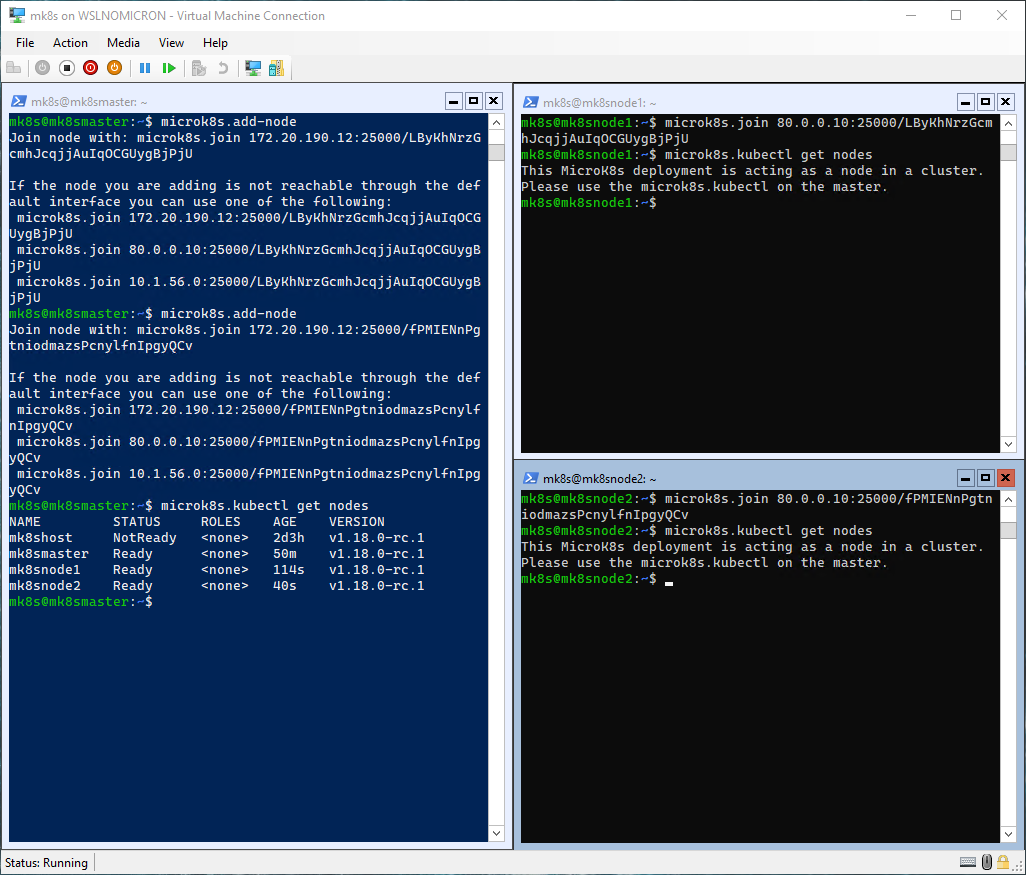
And here we have, a three nodes cluster. Behind the scenes, Microk8s did apply the addons configuration to the other two nodes.
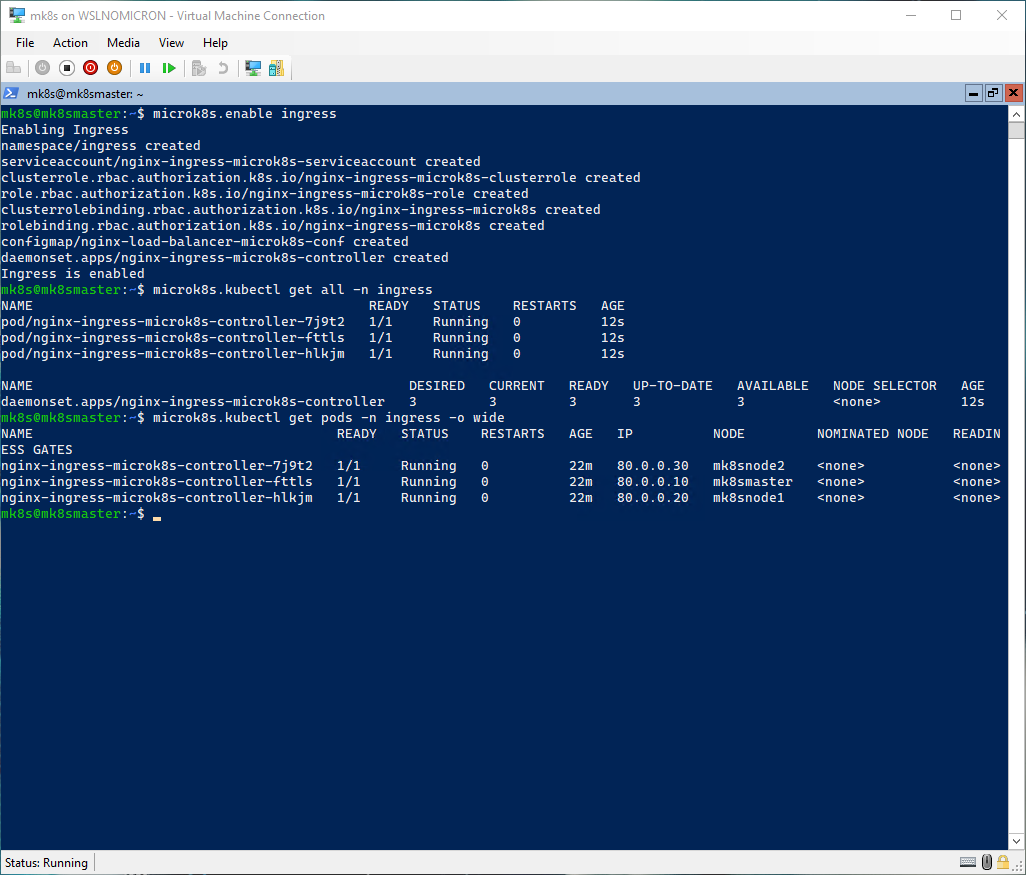
This was not really shown here, as when we imported the distros, the same addons were already installed. So let’s install another addon:
# Install the Ingress addon
microk8s.enable ingress
# Check the installed components
microk8s.kubectl get all -n ingress
# Check which node is running which pod
microk8s.kubectl get pods -n ingress -o wide
Deploying our first app
Our cluster is now running and stabilized, so it’s time to deploy a “real” app and for that, let’s see how our Microk8s cluster on WSL2 can compare to a deployment on a Linux Microk8s cluster (source: https://www.youtube.com/watch?v=OTBzaU1-thg):
# Create a deployment from an image
microk8s.kubectl create deployment microbot --image=dontrebootme/microbot:v1
# Check the pod created
microk8s.kubectl get pods -o wide
# Scale the deployment to 5 replicas
microk8s.kubectl scale deployment microbot --replicas=5
# Check the pods created and on which nodes they're running
microk8s.kubectl get pods -o wide
# Delete one pod of one node running two pods
microk8s.kubectl delete pod/microbot-<id>
# Check the pods created and on which nodes they're running
microk8s.kubectl get pods -o wide
# Expose the deployment as a service using the loadbalancer
microk8s.kubectl expose deployment microbot --type=LoadBalancer --port 80 --name=microbot-service
# Check the service deployed and the external port used
microk8s.kubectl get services
# Browse to http://localhost:<external port used>
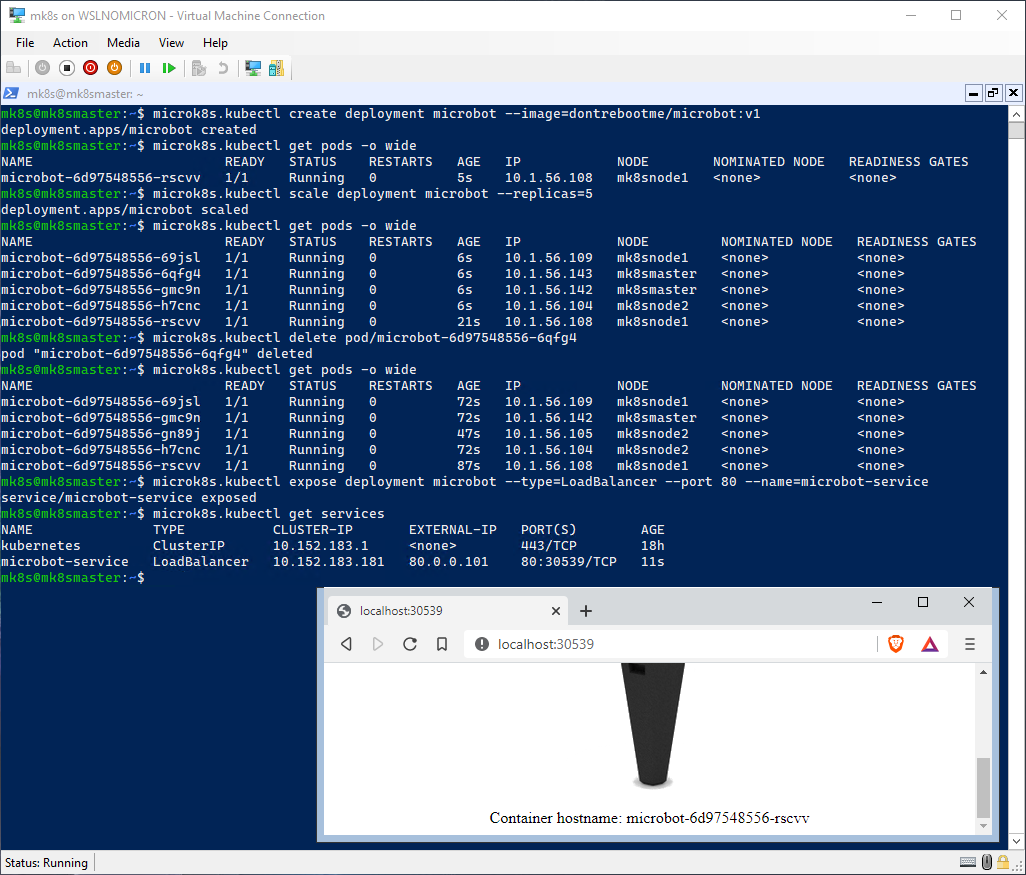
Our microbot deployment is a success!
Conclusion
While the initial setup can be a little bit heavy, once done we could see that the Microk8s was acting as intended and the complete load on RAM (OS + three WSL instances + Microk8s three nodes) is around 9Go (~75% of the 12Go total):
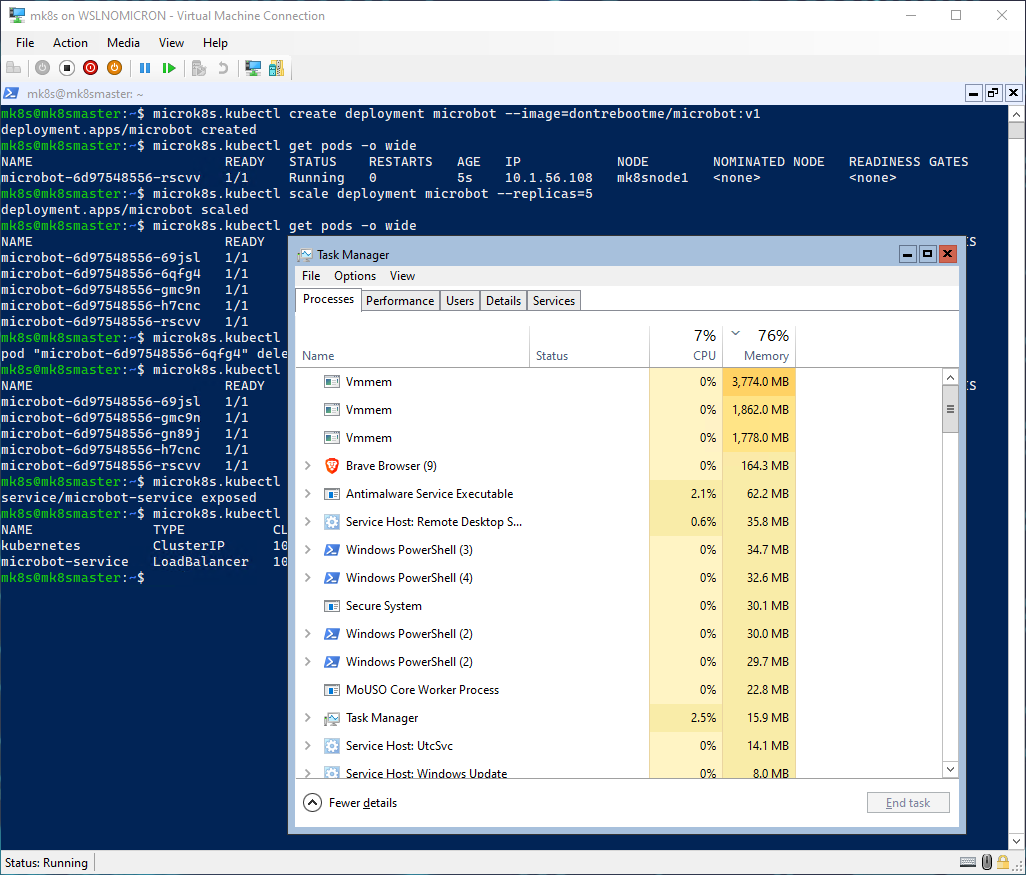
In the long run, WSL2 will get even better and more performant. But in this blog post, as during my WSLConf demo, the real “pandora box” that was opened is the installation of Linux servers on a Windows Server Core thanks to WSL2.
Have fun using Canonical Microk8s on WSL2.
>>> Nunix out <<<